Setting Vendor/Rebate Targets
Description
Vendor targets are the criteria that must be met to apply rebates. All vendor targets must be defined within a period, as they set the timeframe during which they will be valid.
Creating a Target
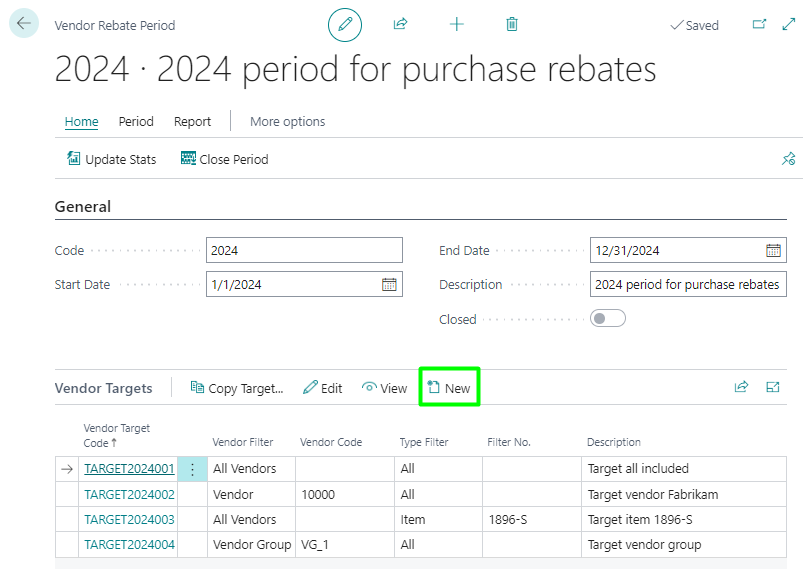
To create a vendor target, select a specific period and click the New button in the Vendor Targets section.


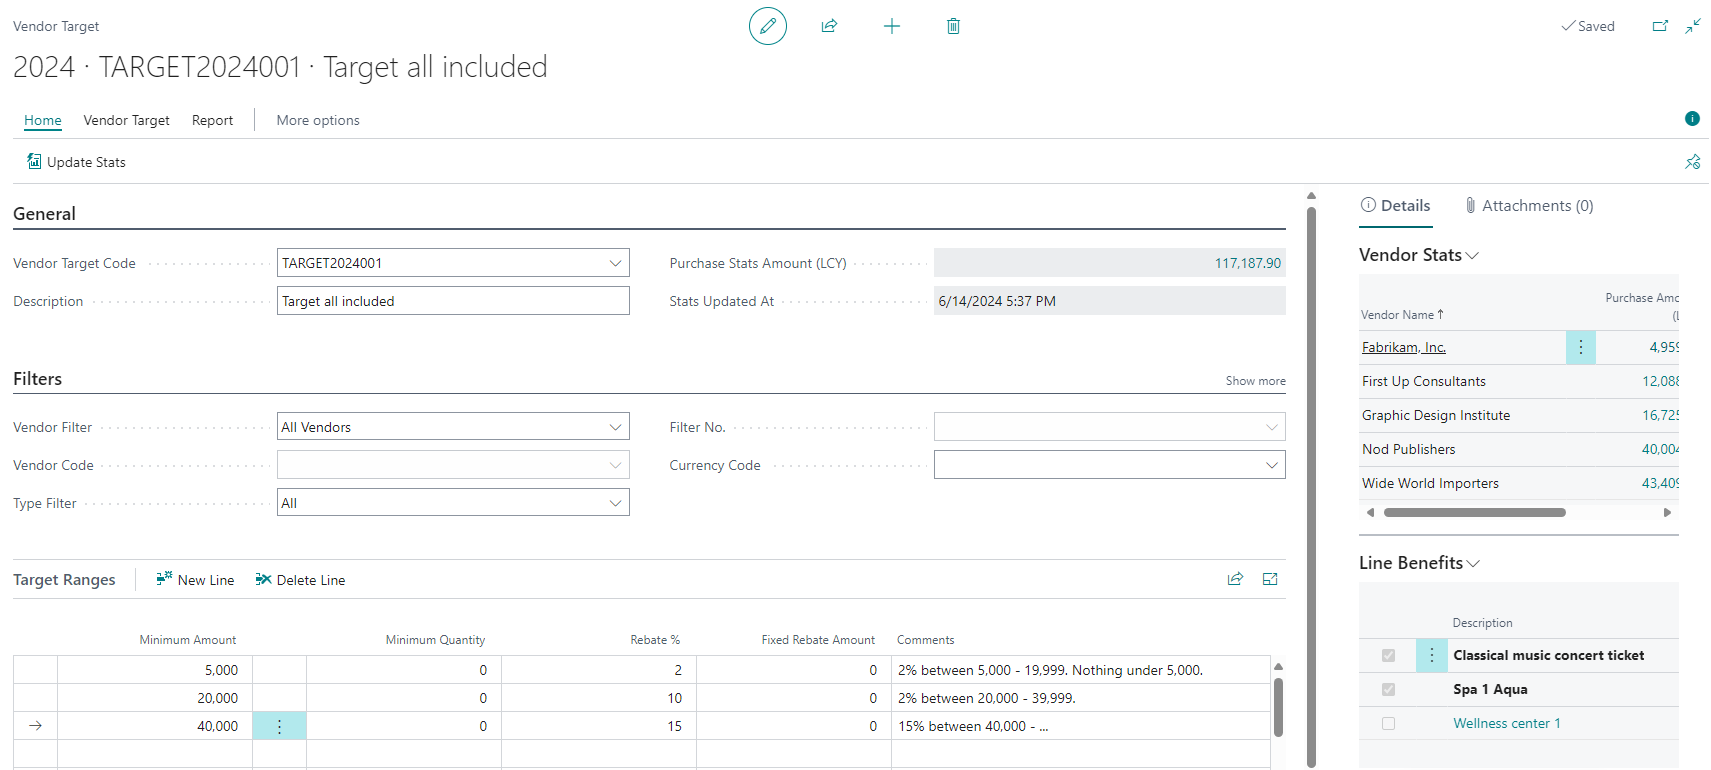
In the main Vendor Targets section or header, you must provide your code, description, and the filters or criteria that will define this target.
- Type Filter. Specifies which types of purchase lines this vendor target applies to.
- Filter Number. Specifies the code for the purchase line filter type, if necessary.
- Purchase Territory. Specifies the purchase territory to which this vendor target applies.
- Dimension Filter 1
- Code. Specifies a dimension filter. If specified, this vendor target can only be applied to purchases with this combination of dimension code and value.
- Value. Specifies a dimension filter. If specified, this vendor target can only be applied to purchases with this combination of dimension code and value.
- Dimension Filter 2
- Code. Specifies a dimension filter. If specified, this vendor target can only be applied to purchases with this combination of dimension code and value.
- Value. Specifies a dimension filter. If specified, this vendor target can only be applied to purchases with this combination of dimension code and value.
Here is a very specific example of vendor target filters, where rebates would apply to invoices and purchase lines with this criterion.

Defining Ranges
Within the vendor target, we find target ranges, which are lines that define the rebate tiers. This allows us to set the minimum range by quantity or amount, along with the percentage or fixed amount that the vendor will earn.
We also have sections at the vendor target level to specify the rebate calculation and the dimensions used to create the rebate reports.

Target Ranges
- Minimum Amount. Specifies the minimum amount (LCY) that must be purchased to reach this target.
- Minimum Quantity. Specifies the minimum quantity that must be purchased to reach this target.
- Rebate %. Specifies the rebate % obtained when the minimum quantity and amount are reached.
- Fixed Rebate Amount. Specifies the fixed rebate amount (LCY) obtained when the minimum quantity and amount are reached.
- Comments. Specifies a brief description for the vendor target line.
Rebate Calculation
- Fixed Rebate Calculation. Specifies how fixed rebate amounts will be applied.
The available values are:
- Maximum. The vendor will receive the highest fixed rebate amount achieved for the fulfilled targets.
- Cumulative. The vendor will receive the total sum of all fixed rebate amounts achieved for the fulfilled targets.
- Multiply by Units Purchased. The rebate amount is calculated by multiplying the fixed rebate amount by the number of units purchased from the vendor.
- % Rebate Calculation. Specifies how rebate percentages will be generated.
The available values are:
- Maximum. The vendor will receive the highest percentage set for the achieved targets.
- Cumulative. The vendor will receive a tiered percentage for each target achieved.
Posting & Billing
Custom G/L Account No.. Specifies the custom account number that will be assigned to the settlement lines included in credit memos to settle rebates. When this field is empty, the account specified in the general settings will be used.
Department Code. Specifies the code for the global dimension linked to the record or movement for analytical purposes. The rebate reports generated for this vendor target will be assigned to this value.
- Vendor Group Code. Specifies the code for the global dimension linked to the record or movement for analytical purposes. The rebate reports generated for this vendor target will be assigned to this value.
Benefits
Benefits are additional rewards or incentives offered to the vendor when they achieve certain vendor targets set in the rebate tier. They can be custom benefits such as a spa voucher.
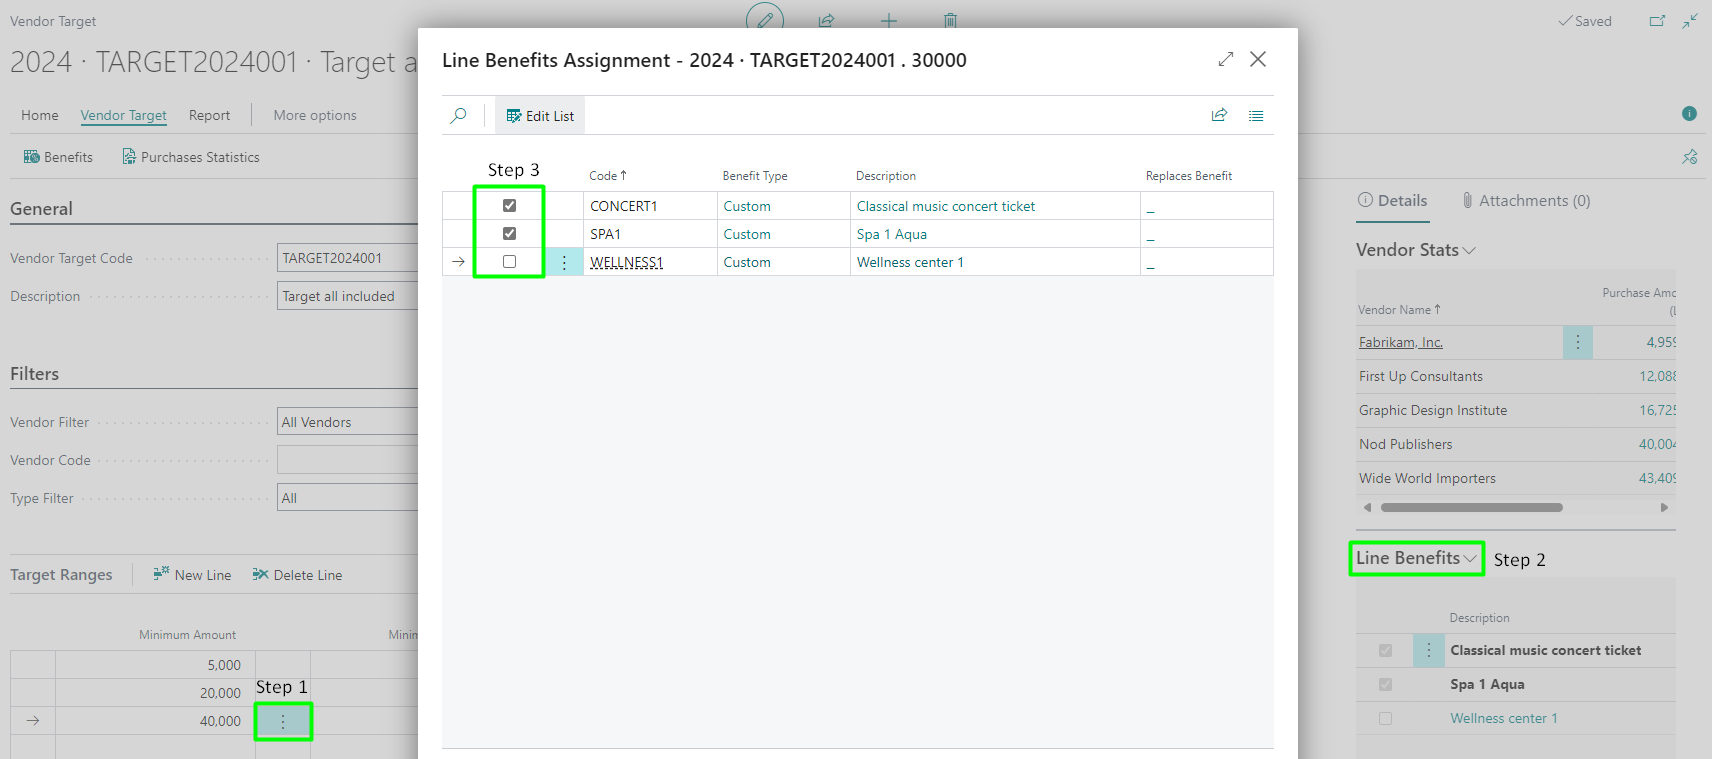
To create them, we can access through the Vendor Target, Benefits buttons.

To assign a benefit to a vendor target, we must first select the target tier line and then access from the information panel on the right-hand side. Then, we simply check the box of the benefit we wish to associate.

Viewing Reports
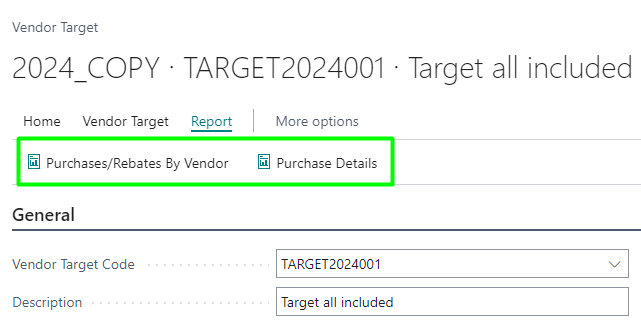
Purchase reports by vendor allow you to visualize the benefit or amount for the rebate tier achieved for each vendor. You can print these reports to get a detailed view of each vendor's performance based on the set targets.
