Azure Configuration for Saas
It is recommended to install the extension with an Essential or Premium user to evaluate the program thoroughly without worrying about this configuration.
The program can function with the following user types:
- Essential.
- Premium.
- Device.
- Team Member.
If you plan to use Team Member users, you will need to enable registration via a webservice since these users cannot perform picking registrations or inventory movements.
In the configuration section, you can see how to activate the webservice both for an OnPremise and Saas environment. To obtain the necessary data for Saas, you'll need to register in Azure.
Azure Configuration for Saas
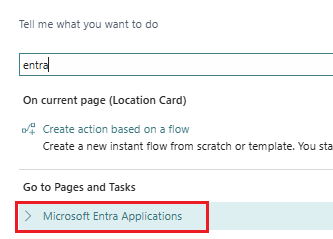
Access the portal at https://portal.azure.com and log in with an account with administrator privileges:
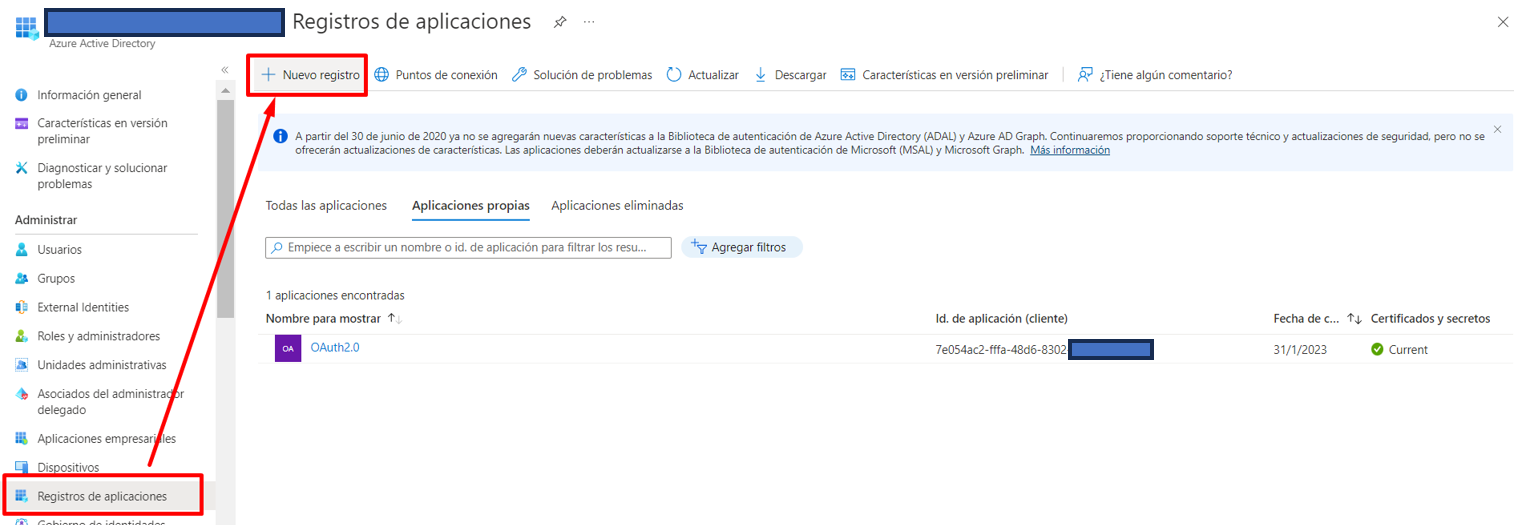
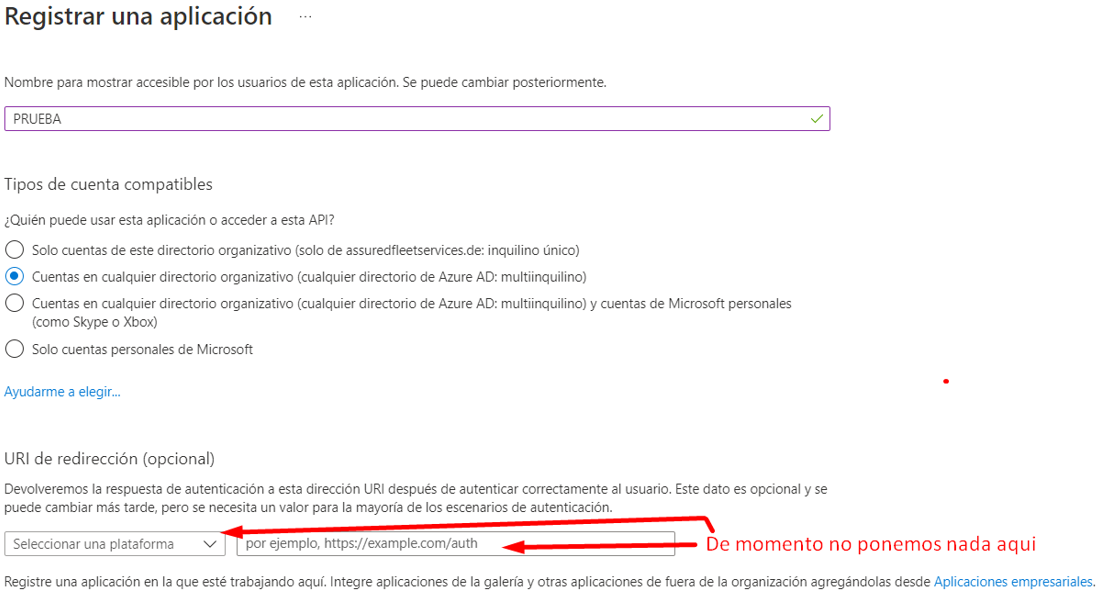
Let's walk through the process step by step:
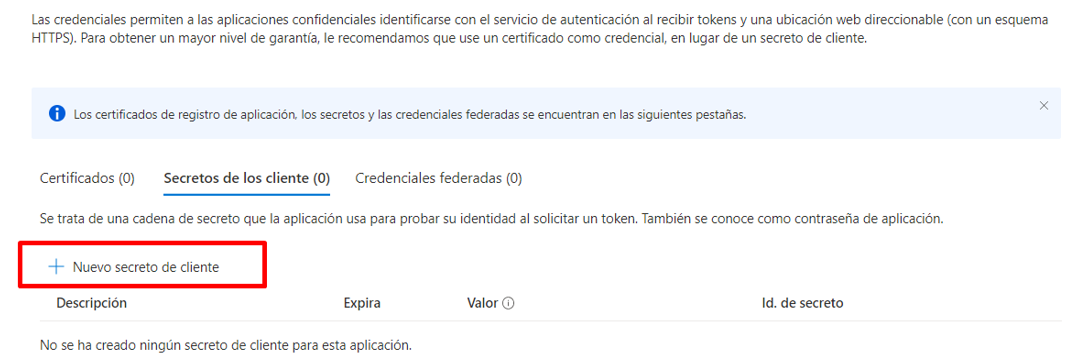
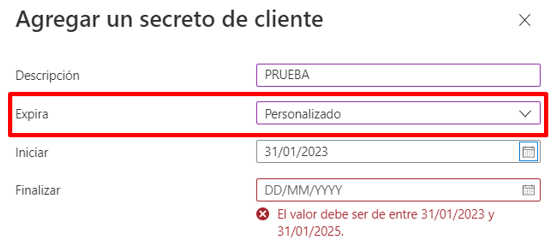
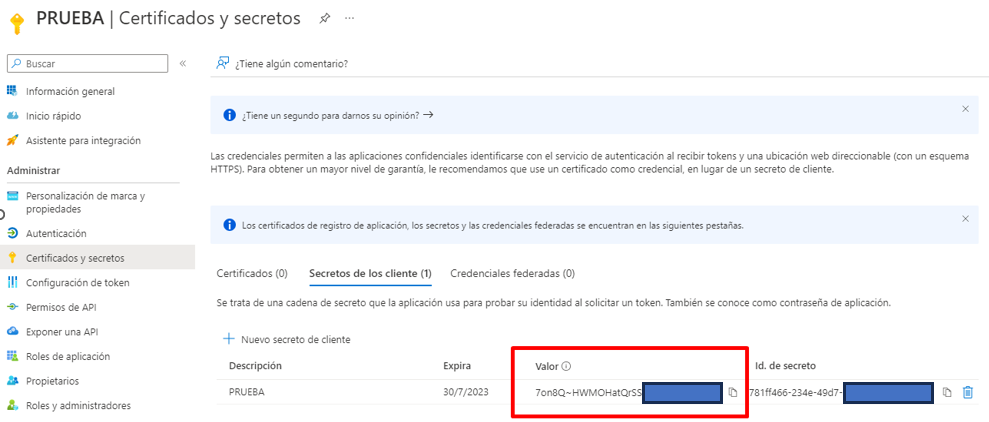
Add a certificate or client secret:

Here, define the expiration period (it allows customization for up to 2 years):
 After accepting, view the result:
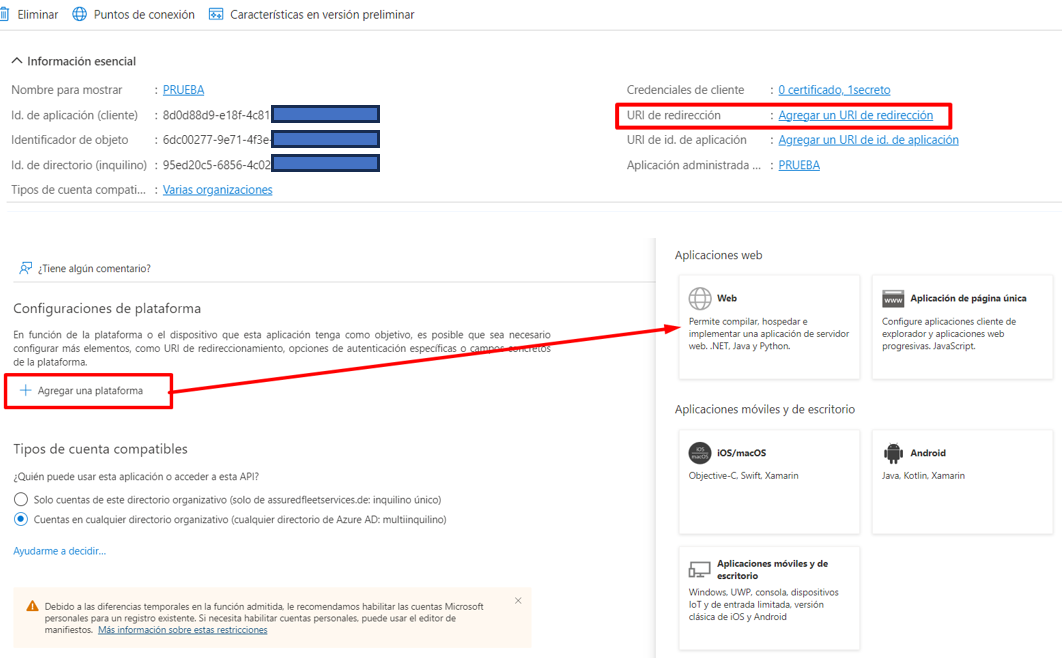
Add Redirect URI:
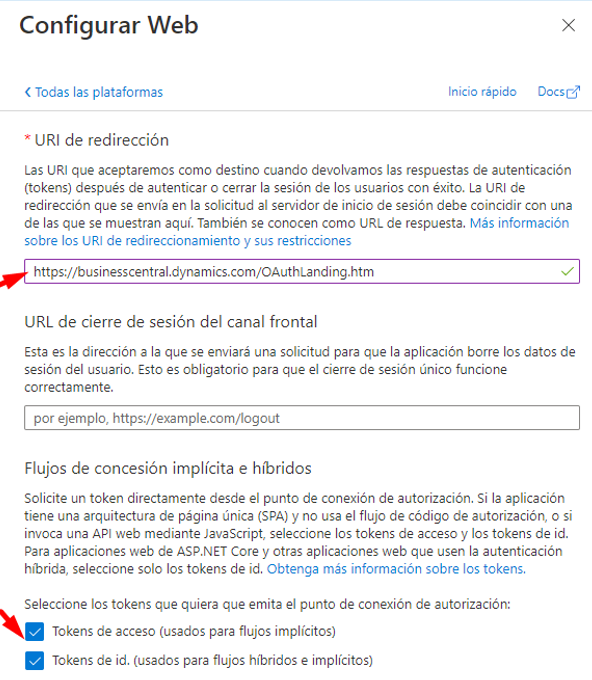
 In Redirect URI, use https://businesscentral.dynamics.com/OAuthLanding.htm and select both tokens:
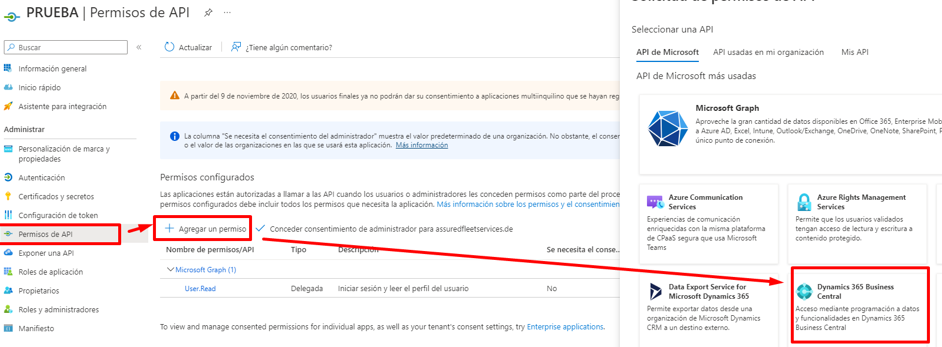
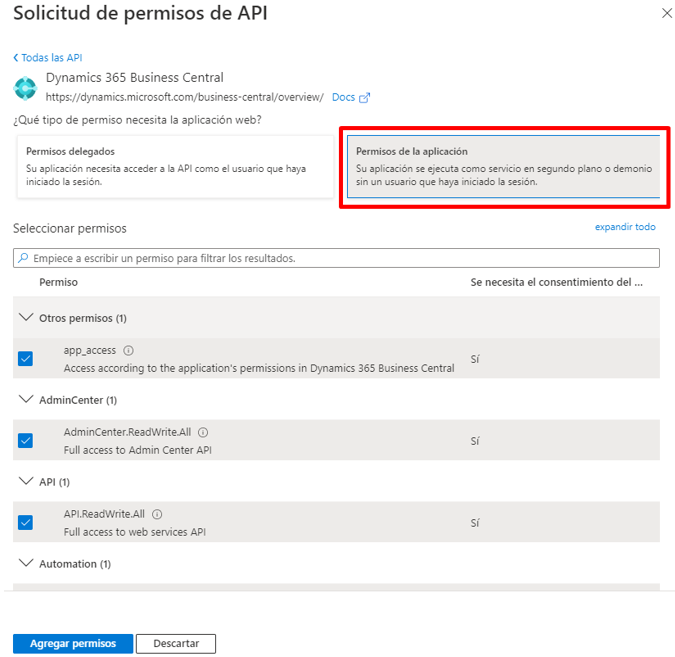
Now grant API permissions for Business Central (select all):
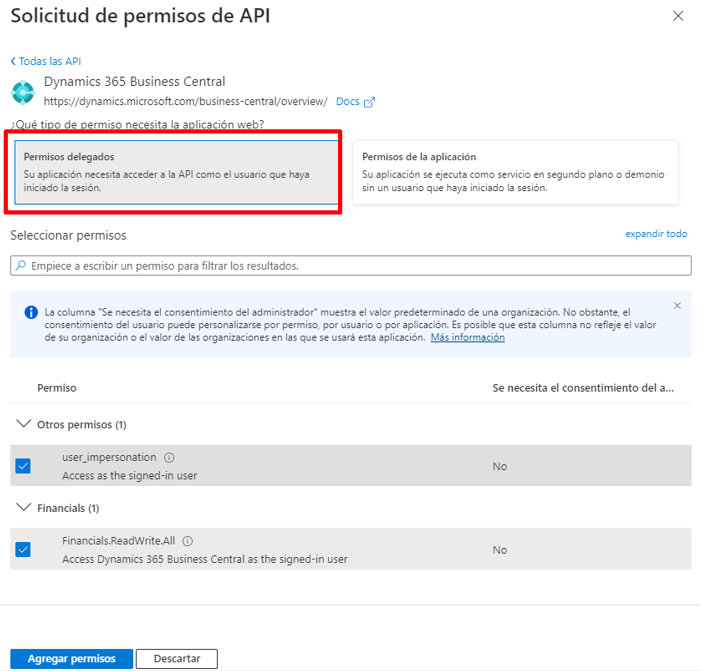
 ...then delegate permissions (where you also select all):
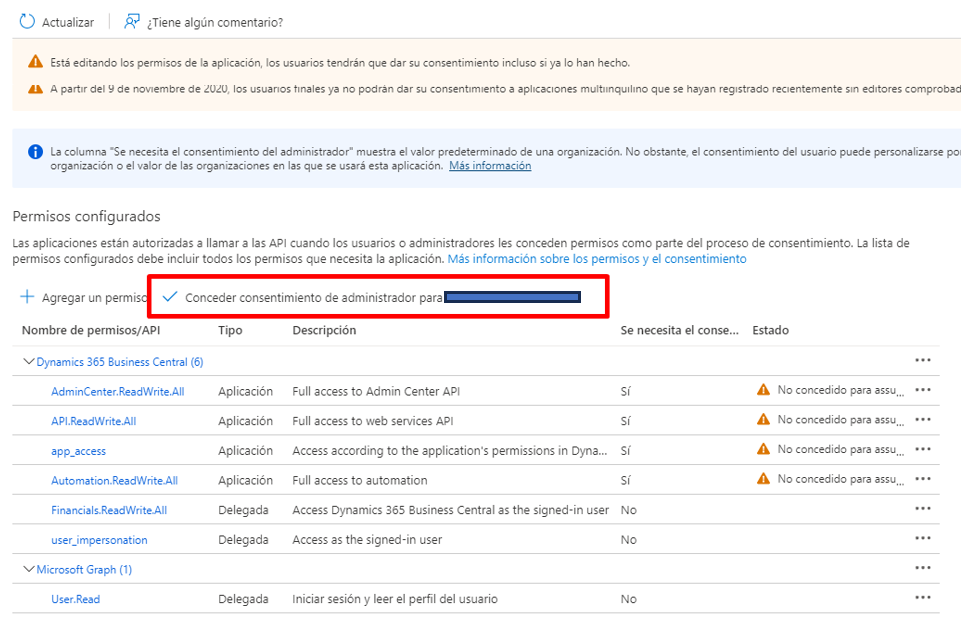
 and click on Grant admin consent:
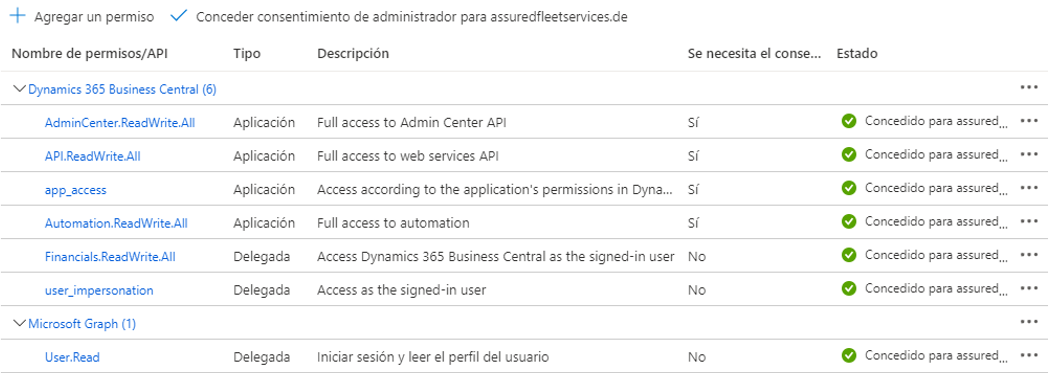
With this, the Azure part will be completed, and you will see the following result:
When adding the expiration period, the client secret value will be created, visible only at this moment. Therefore, copy and save it for later use.
Configuration in Business Central Saas
Once you've registered the App in Azure, you'll need to grant the necessary permissions in Business Central.
Create a new application user with the ClientId registered in Azure and set the State as Active:
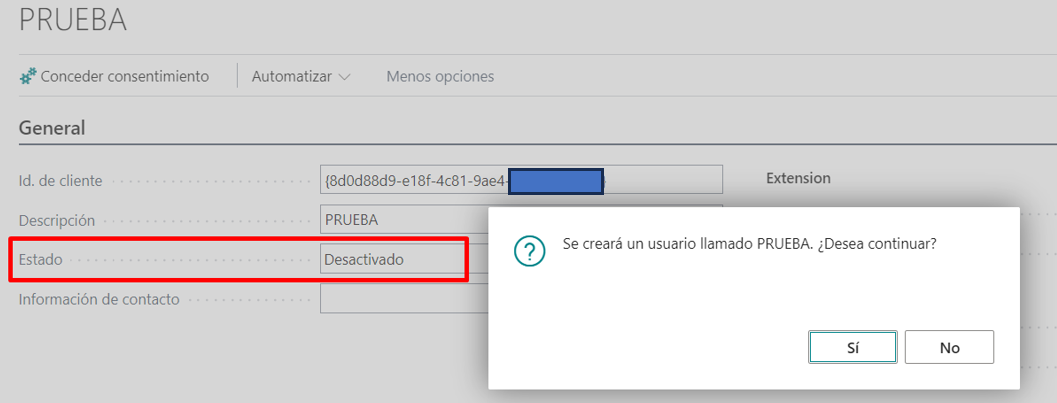
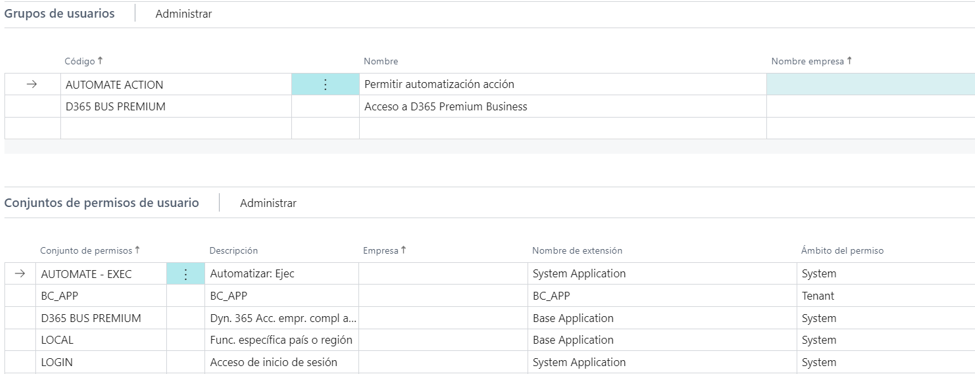
This will allow assigning permissions that were previously uneditable. It should look like this (including the BC_APP extension of the client). It's important to remove the company name filter so that it can be used in all companies and not just the one we're creating.
 and click on Grant admin consent:
With this, the process should be completed.