Exploiting Incident Information
As seen in the overview of the new tables added by iDynamics Incident Management, the incident information is spread over several tables, so in order to see all the information together, the corresponding queries and web services must be created.
Queries
iDynamics Incident Management offers two queries as standard, published as web services, so that they can be used.
These queries are based on three tables:
- Incicent Header. Information on the incident itself. PK("No.").
- Incident Entry. Entries with information of closing/opening of the incidents. PK("Entry No."). Link with Incident Header ("Incident No.").
- Incident Line. Incident source document lines PK("Incident No.", "Line No."). Link with Incident Header ("Incident No.").
The queries show all the fields of the mentioned tables. If you want to add custom fields, you will have to create new queries.
Incidents. Joins the table of incident headers with that of their entries to see information such as dates and closing/reopening reasons together with the rest of the information of the incidents. If there are no entries, the incident data is also displayed.
Incident Source Document Lines. Joins the table of incident headers with their rows, but, in this case, only the incidents that have rows are shown because the purpose is to see the source document rows affected by an incident.
Web Services
iDynamics Incident Management publishes two web services, related to the two queries indicated in the previous point.

If new queries are created, new web services must be published, corresponding to the new queries created, but the process for their use is the same.
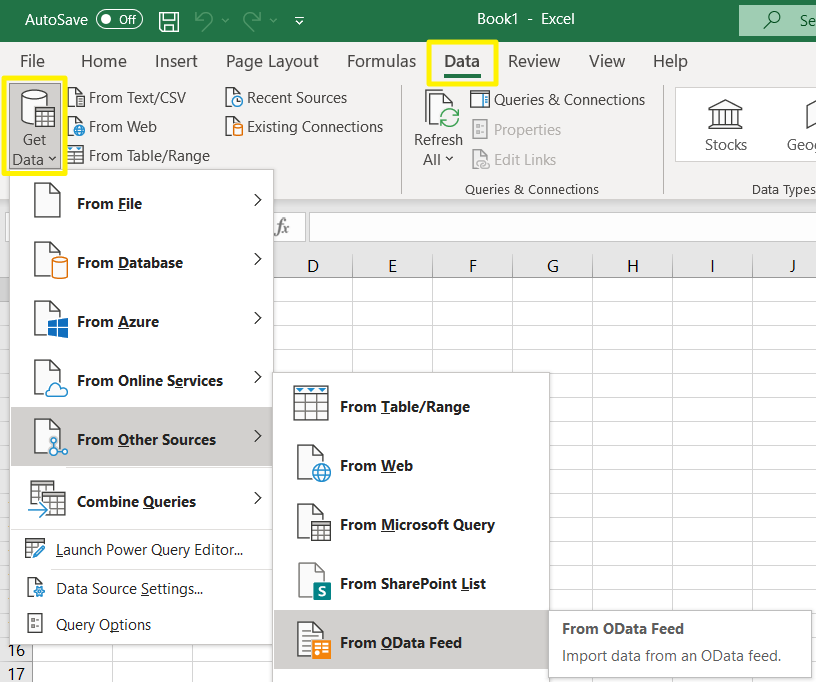
Below are the steps on how to use the web service corresponding to the incident query from Excel.
- First, from the Business Central web services page, copy the OData URL of the web service corresponding to the incident query.

- Then, open an Excel spreadsheet and navigate to the action Get Data - From Other Sources - From OData Feed.

- Finally, paste the URL copied in the first step, press "OK" and then "Load" to import the resulting data into Excel.

Below is an example of incident data imported into an Excel spreadsheet:
