Getting Started
Description
Welcome to iDynamics Rebates, in this part of the guide we will see how the application can speed up the management of vendor rebates in Business Central. This documentation will guide you through the entire process of the application, facilitating the configuration, creation, and reporting vendor rebates.

This menu provides direct access to the main functions offered by the application, and we recommend that you explore all the options once you have finished this guide.
Setup
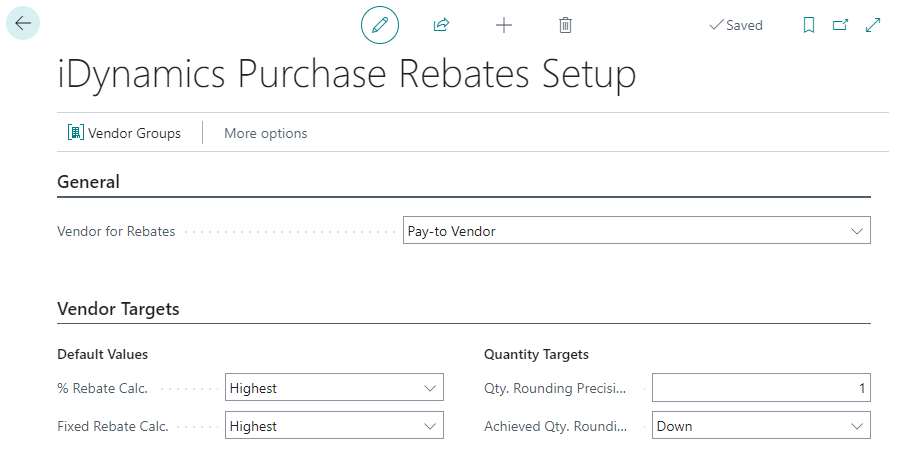
Before starting to create periods, it is important to set up a general configuration in Rebates. In this page we can create groups of vendors for the purchase rebates or configure the default values that the configuration parameters will have.
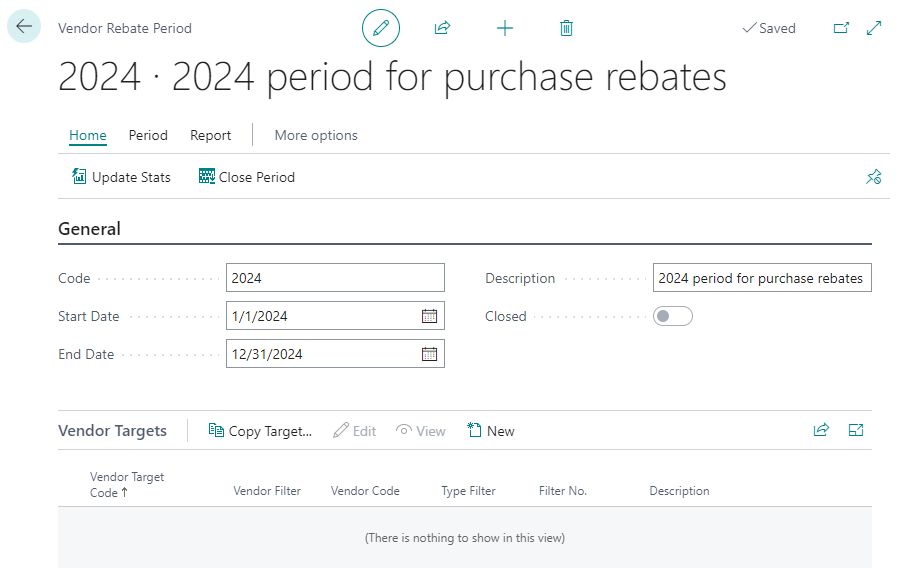
Create a Period
Let's start by creating a new period from the vendor periods and targets page. Each item in the list represents a time period during which rebates will be applied, and within each period, we can set the vendor targets to generate the rebates.
On this page, we can create new periods by clicking the New button. It also offers views that allow us to apply saved filters, such as open periods, and additional buttons to copy periods or access related pages, such as accrual entries or purchase statistics.

The fields required to create the period include the period code, the date range during which it will be active, a description, and the type of invoices to be considered for this rebate.
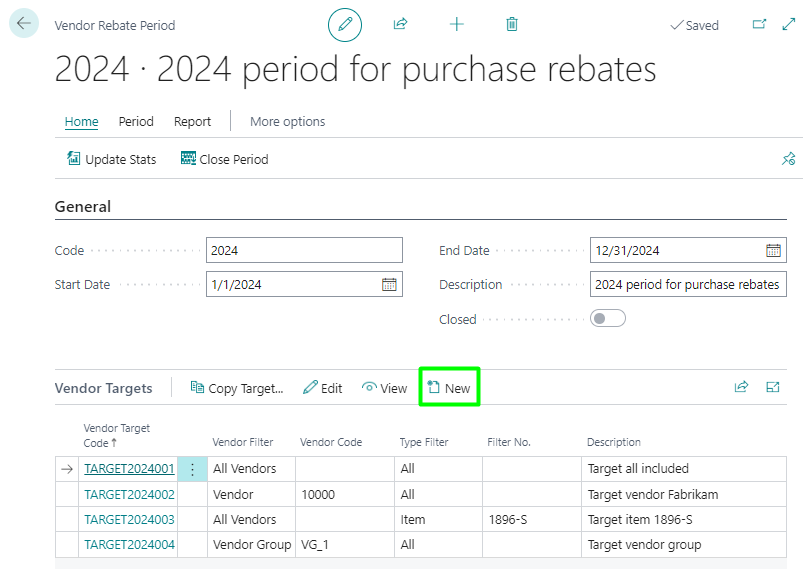
Define Vendor Targets/Rebates
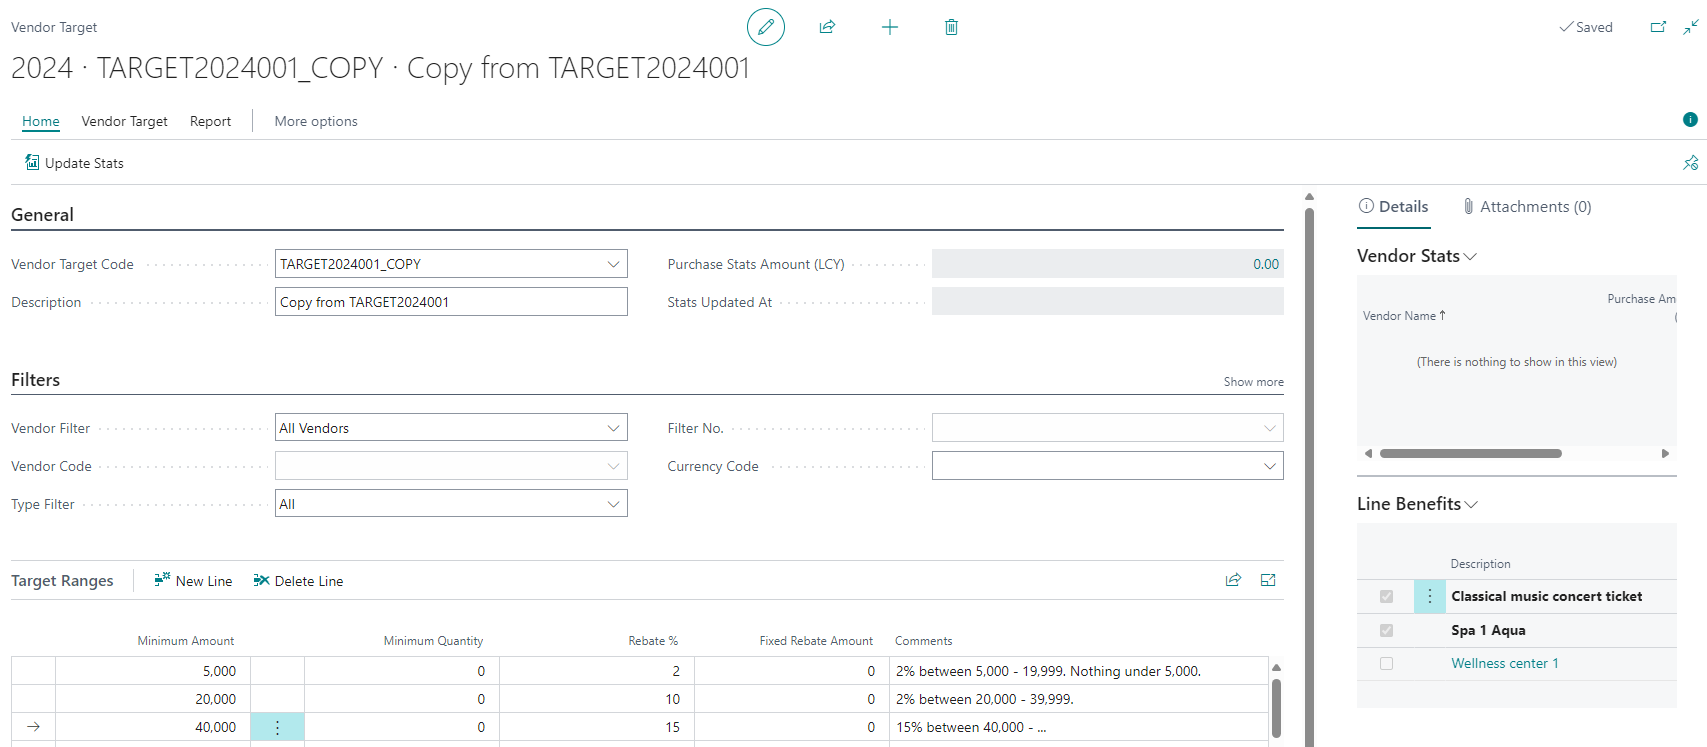
Vendor targets are the criteria that must be met to apply the rebate. All vendor targets must be defined within a period, as they set the time frame during which they will be valid. To create a vendor target, we select a specific period and click the New button in the Vendor Targets section.
In the main section of Vendor Targets or header, we must enter the code, description, and the filters or criteria that will define this target. Within the filters section, the Vendor filter specifies whether the vendor target applies to a specific vendor or group of vendors, or does not filter by this criterion. Additionally, the Type filter specifies which types of purchase lines this vendor target applies to. There are also additional filters to specify the territory where this target applies and the dimensions within Business Central that may be involved. Within the vendor target, we find the Target Tiers, which are lines that define the rebate tiers. This allows us to set the minimum range by quantity or amount, along with the percentage or fixed amount that we will earn.
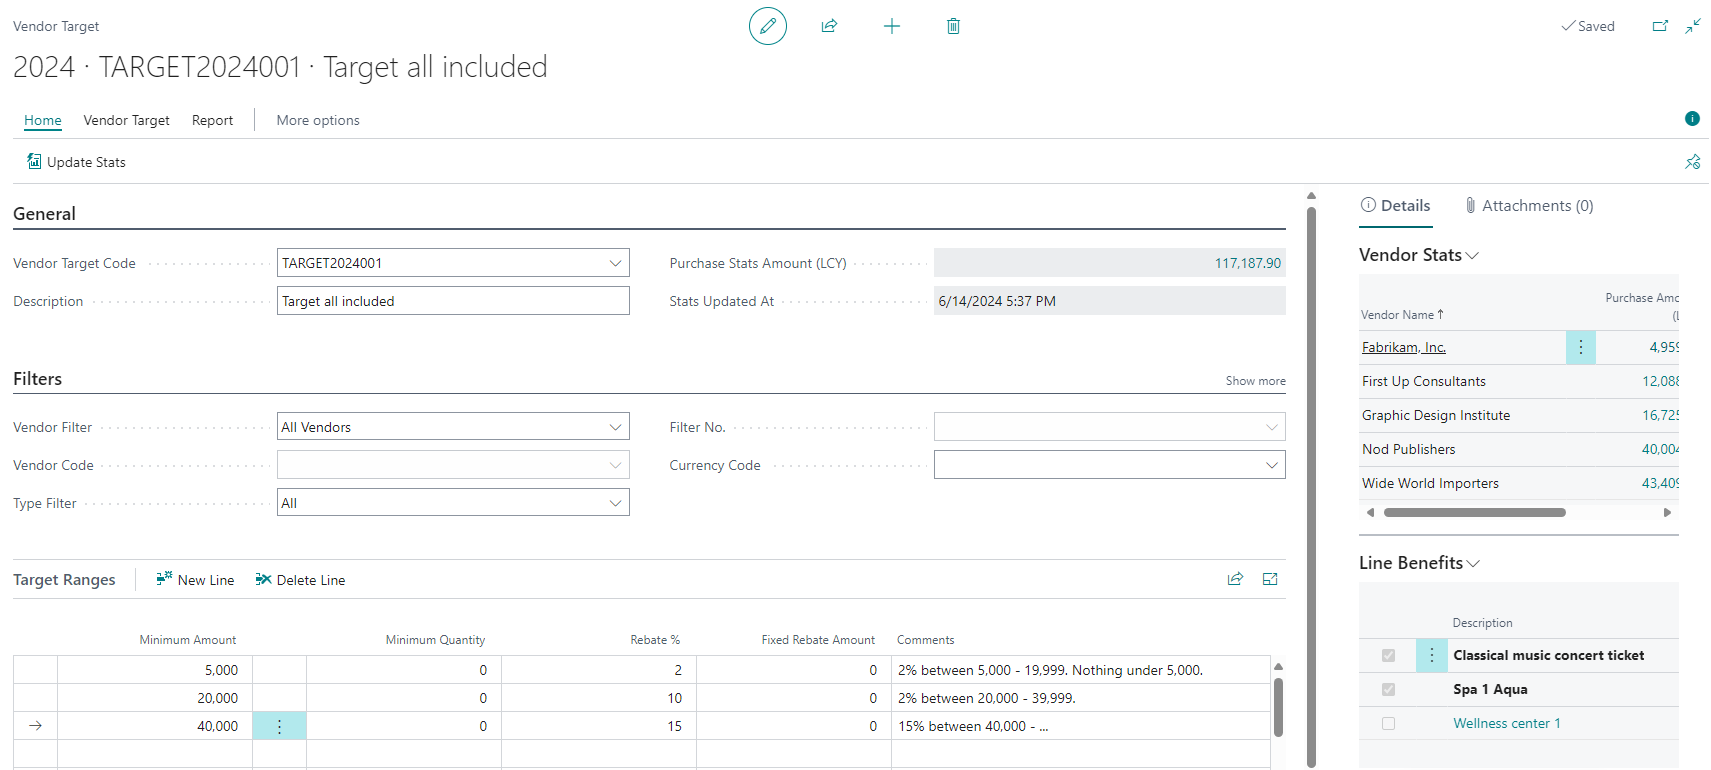
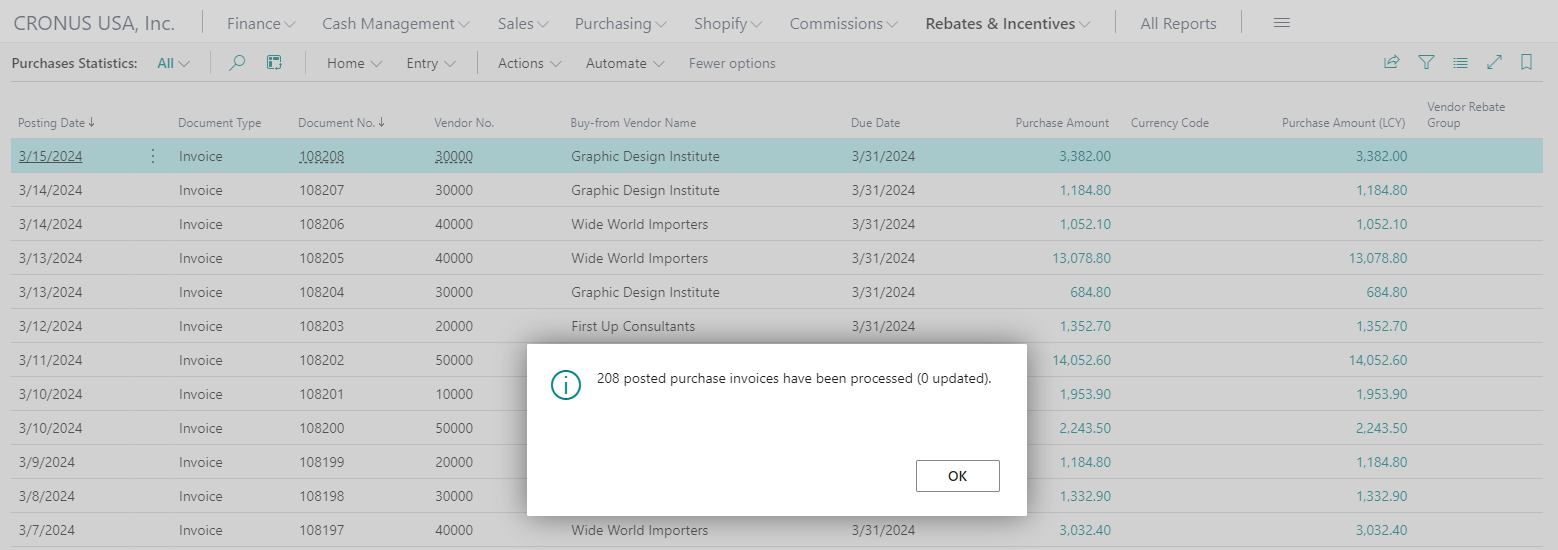
Since this is the first time we have created the period and billing records already existed, we need to update the purchase statistics.

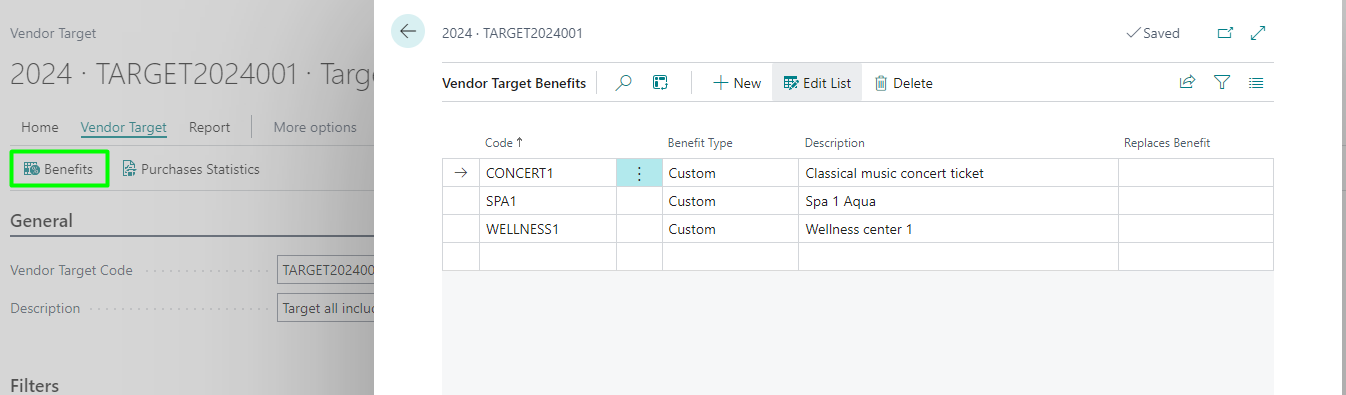
Set Benefits
Benefits are additional rewards or incentives offered to the vendor when they reach a certain target tier within the vendor target. They can be additional discounts, special delivery conditions, or any other business incentive.
To create them, we can access through the Vendor Target > Benefits buttons.
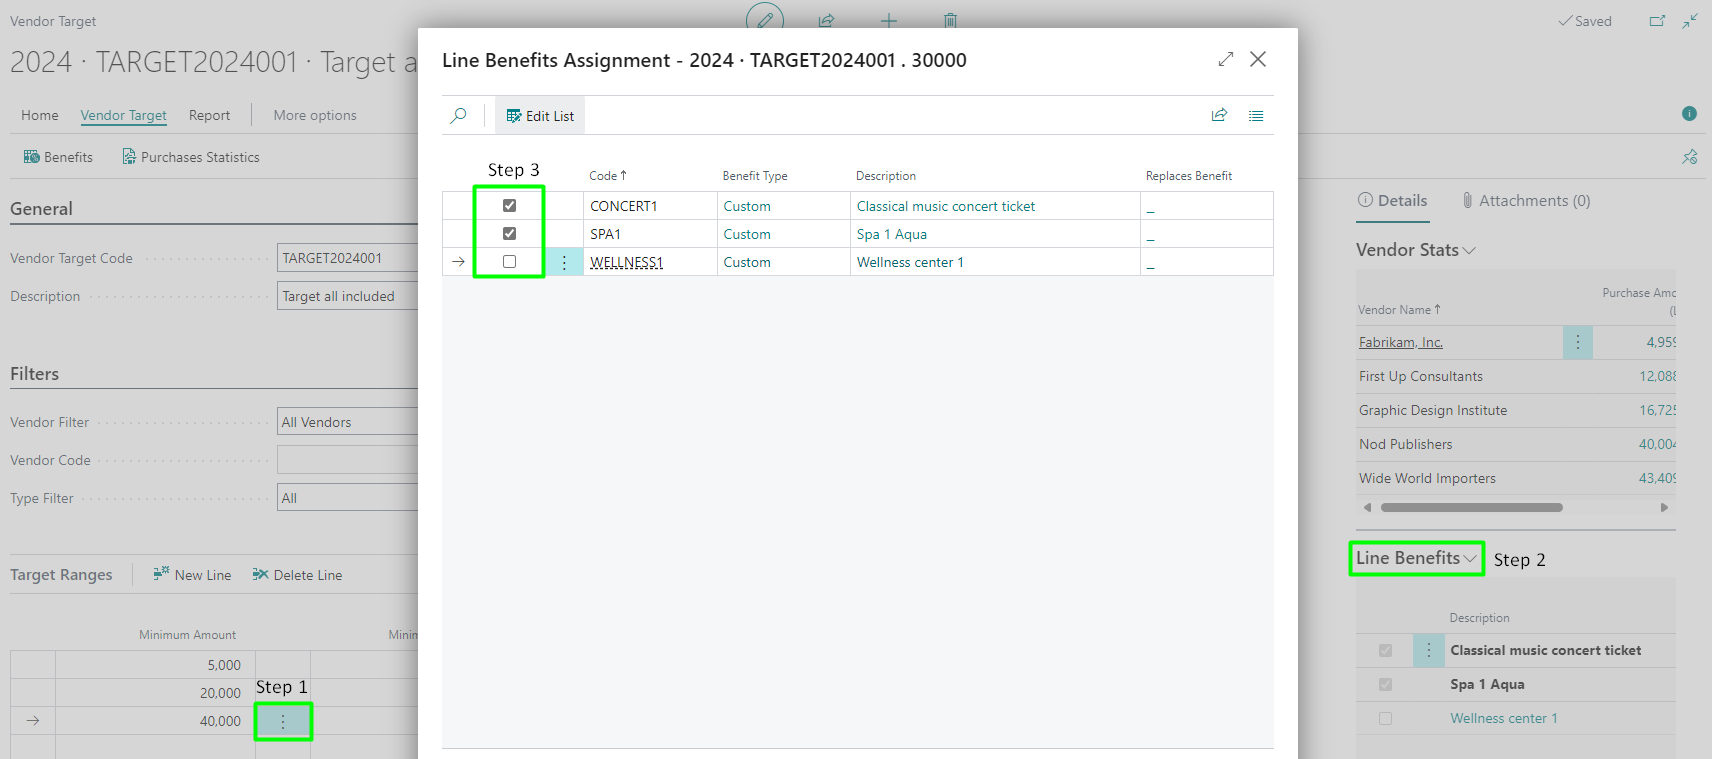
Select a Benefit
To assign a benefit to a vendor target, we must first select the target tier line and then access from the information panel on the right-hand side. Next, we simply check the box of the benefit we wish to associate.
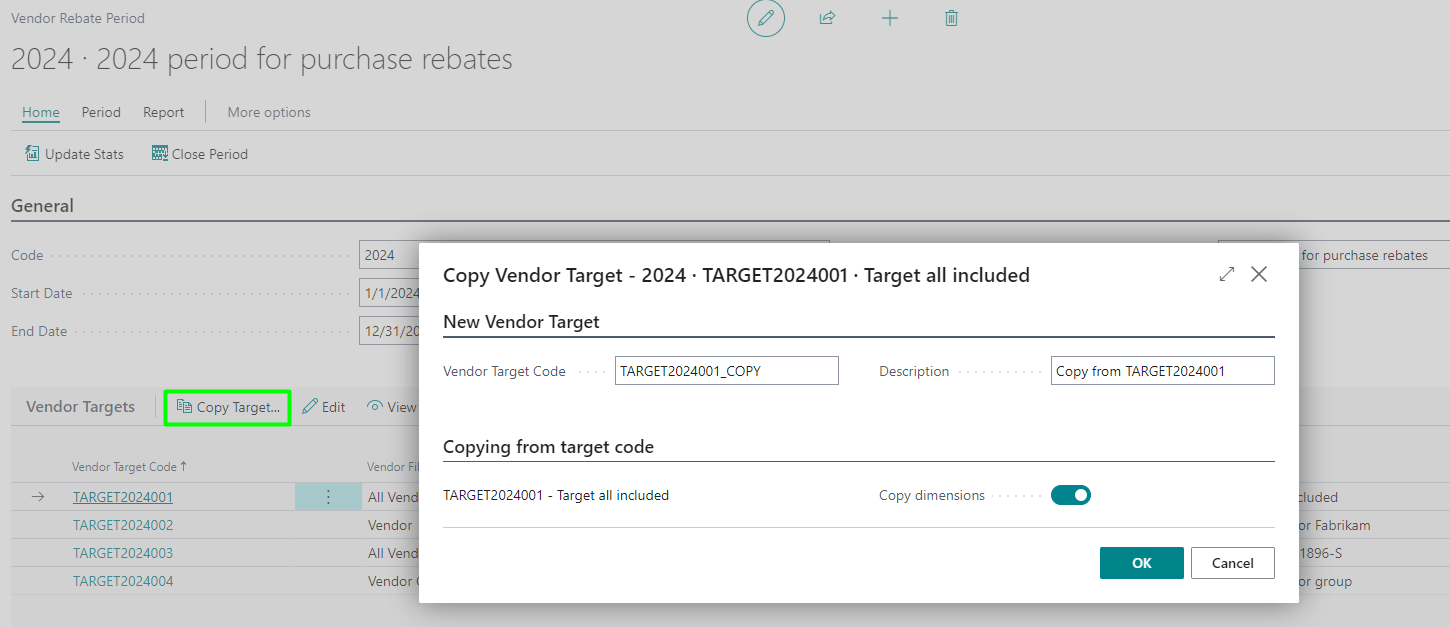
Copy Targets
In the vendor targets list within a period, we have buttons to copy the selected target, including its target tiers and associated benefits.
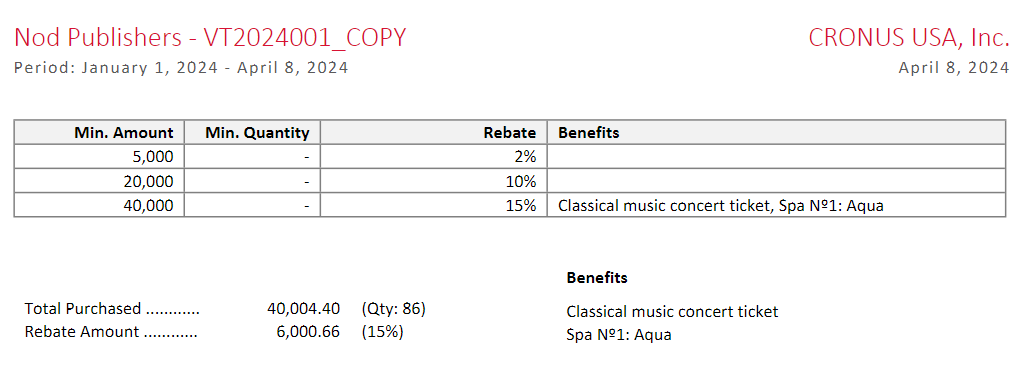
View Rebate Reports
To view rebates, you can generate purchase reports by vendor, showing the benefit or amount for the rebate tier reached by each vendor. This will give you a clear view of the accumulated rebates and benefits obtained.
Rebate Payment
Generating Rebate Entries
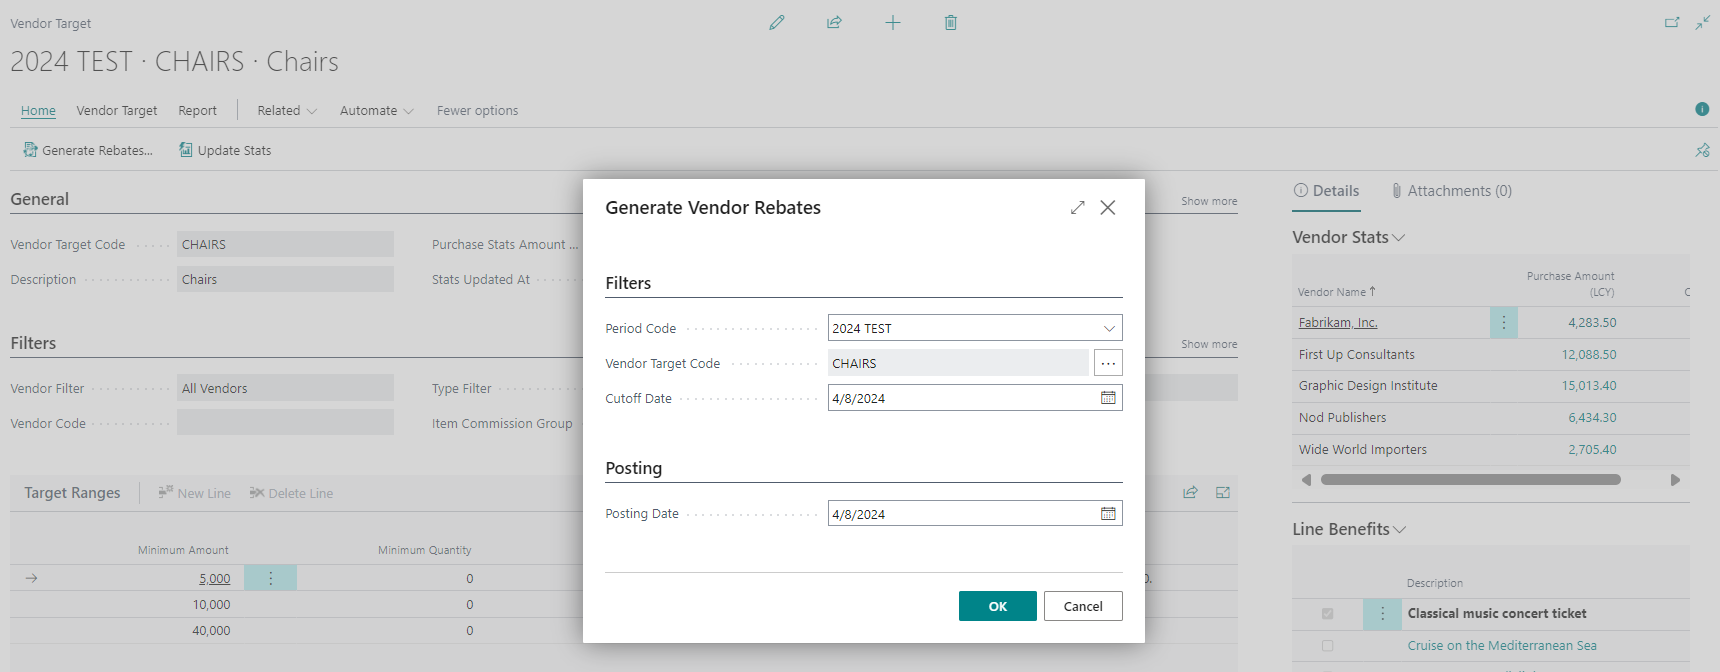
To generate rebates, simply click on the Generate Rebate button and review the filter and posting date that will be applied.
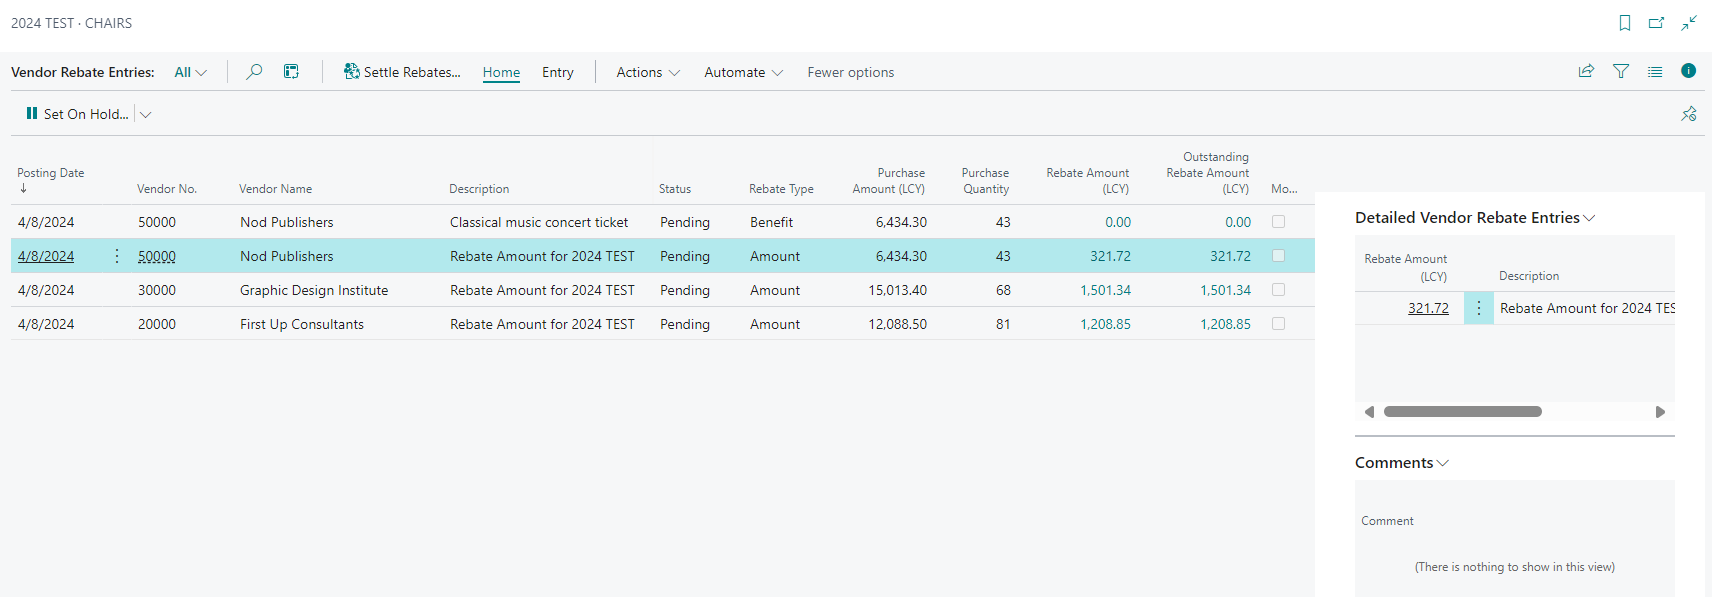
Afterwards, we can review the generated rebate entries from the Rebate Entries action.
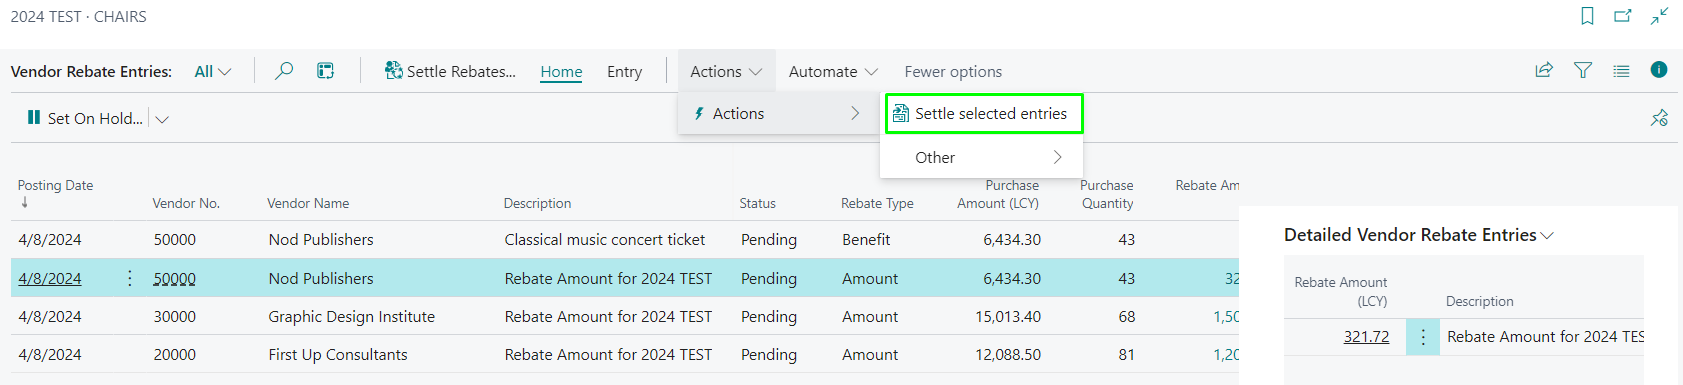
Settling Pending Rebates
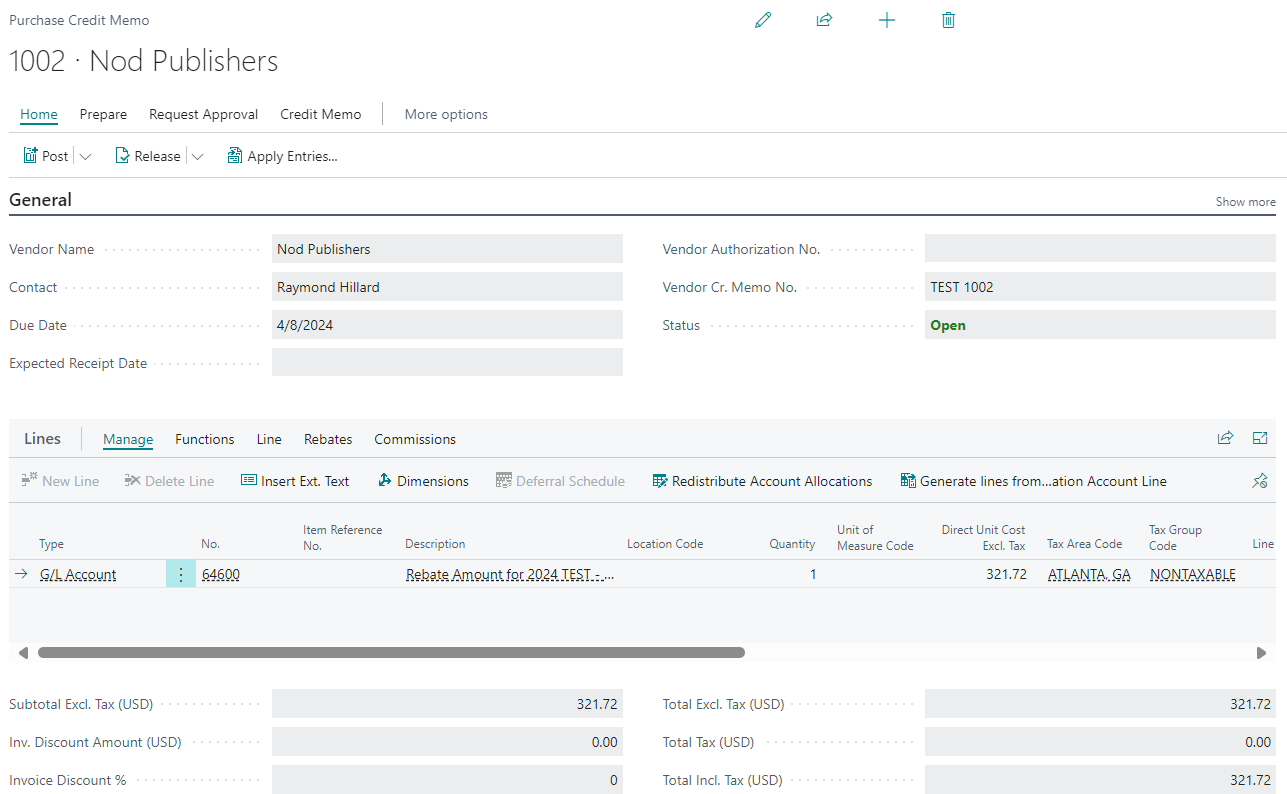
From the rebate entries page, we can settle each rebate using the configured settlement method. In this case, a purchase credit memo will be created for the vendor, which will include a general ledger account line corresponding to the rebate account configured in iDynamics Rebates in the section for settling by purchase credit memos. This way, when the credit memo is posted, the settlement will be reflected in the accounting system, and the rebate entry will show as settled.
When a custom-type benefit is settled, its status simply changes to settled, indicating that it has been delivered to the vendor.
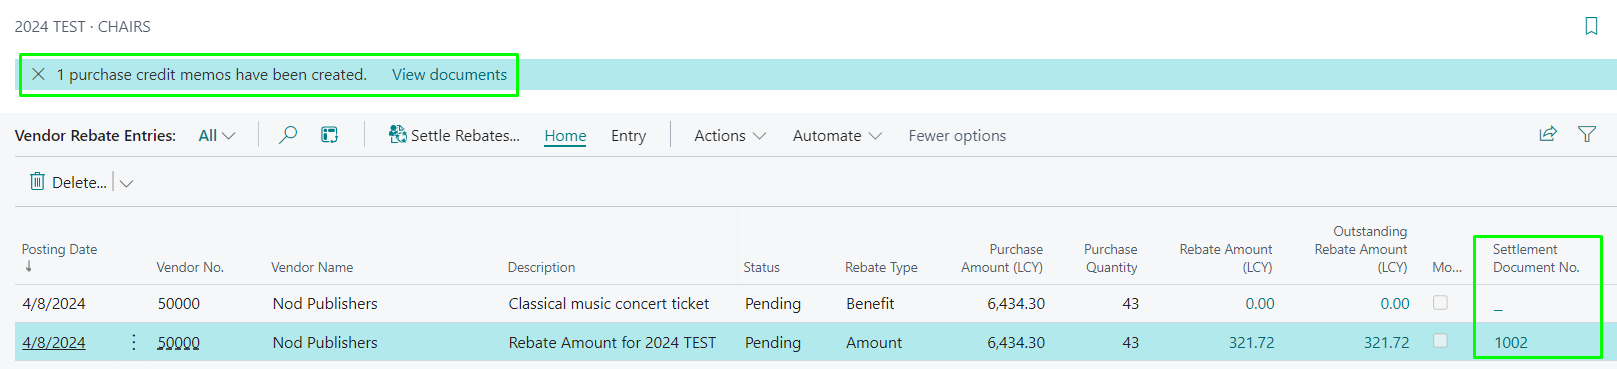
Once posted, we can return to the corresponding rebate entry to ensure that the settlement has been applied correctly.

Next Steps
This guide has been just an overview of the application, but we hope it has helped you get familiar with some of its main features. Depending on your requirements, we recommend that you:
- Configure vendor periods and targets so you can track rebates.
- Discover the utility of all the new reports within the application.
- Learn how to manage Rebate Entries.
- And of course, learn how to set up and perform settlements.
And remember, this is just the beginning of your journey. We recommend starting slowly by setting a long period without vendor filters, and gradually discovering the rest of the features as needed. And don't forget to check the changelog from time to time to discover all the features we continue to add to the application.
Finally, if you need help or have any questions that are not answered in this manual, please feel free to contact us.