Pack Items
Depending on the setup of the location on which we are working, the packaging can be carried out from:
- Sales (or purchase return) documents.
- Transfer orders.
- Pick activities or shipment documents.
For the following example we will use a pick document.
Select a package
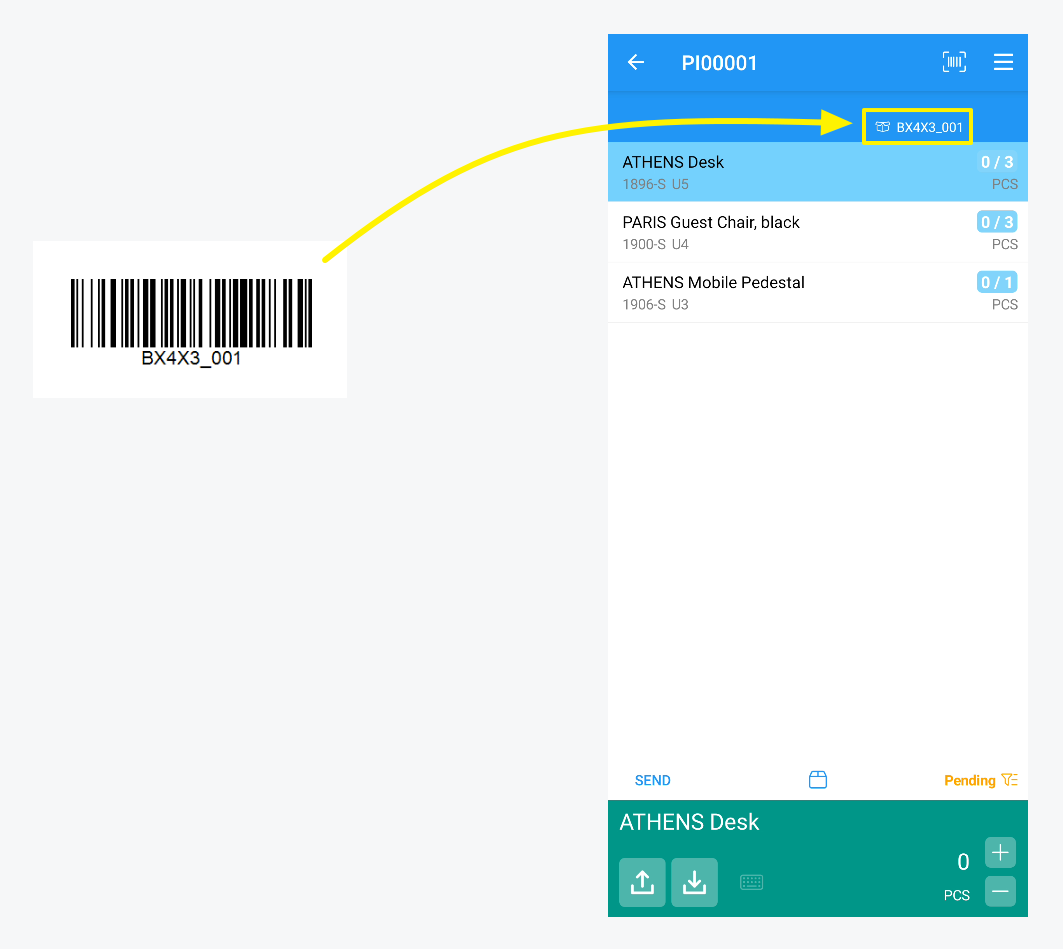
The first step in carrying out the packaging process is to select the package to use (in the case of existing packages), or assign a barcode to the package (in the case of new packages).
Package selection is done automatically by reading a barcode that meets the pattern defined for the package type.


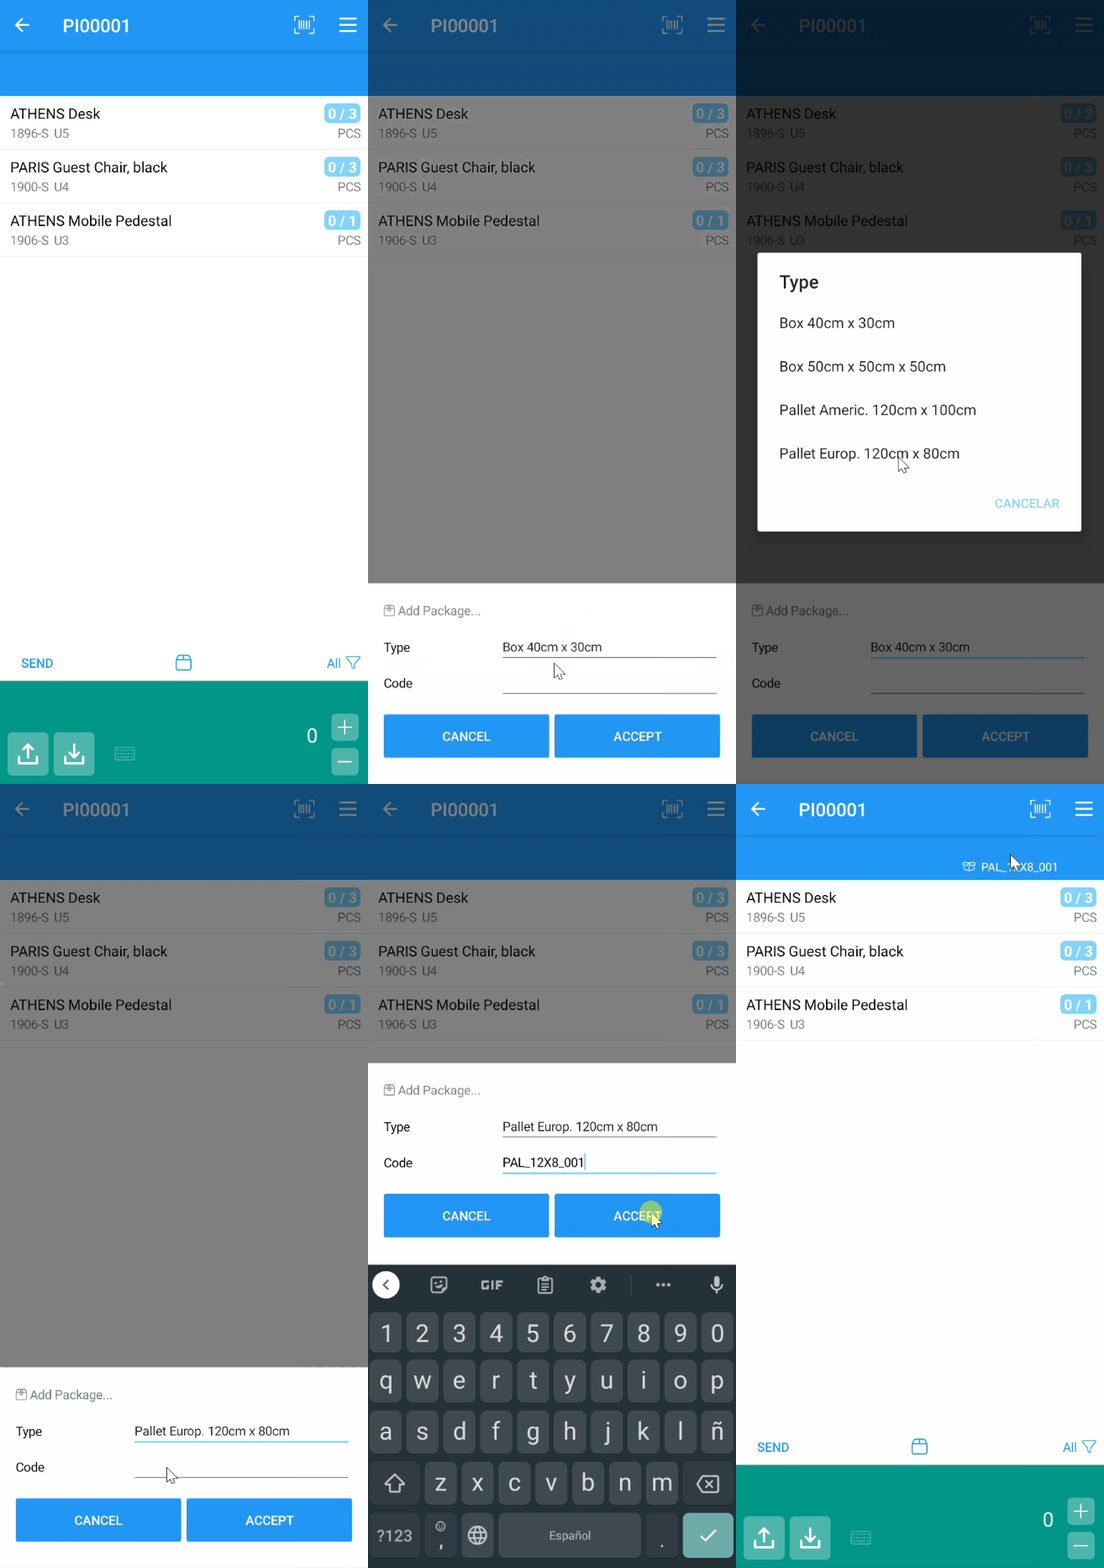
If the barcode of the package does not match the pattern defined for the package type, or you have not defined one, you can add the package manually. To do this, use the "package" icon located below the list of items.

If the package icon is not visible, make sure that you have defined at least one package type in Business Central.
Add content to the package
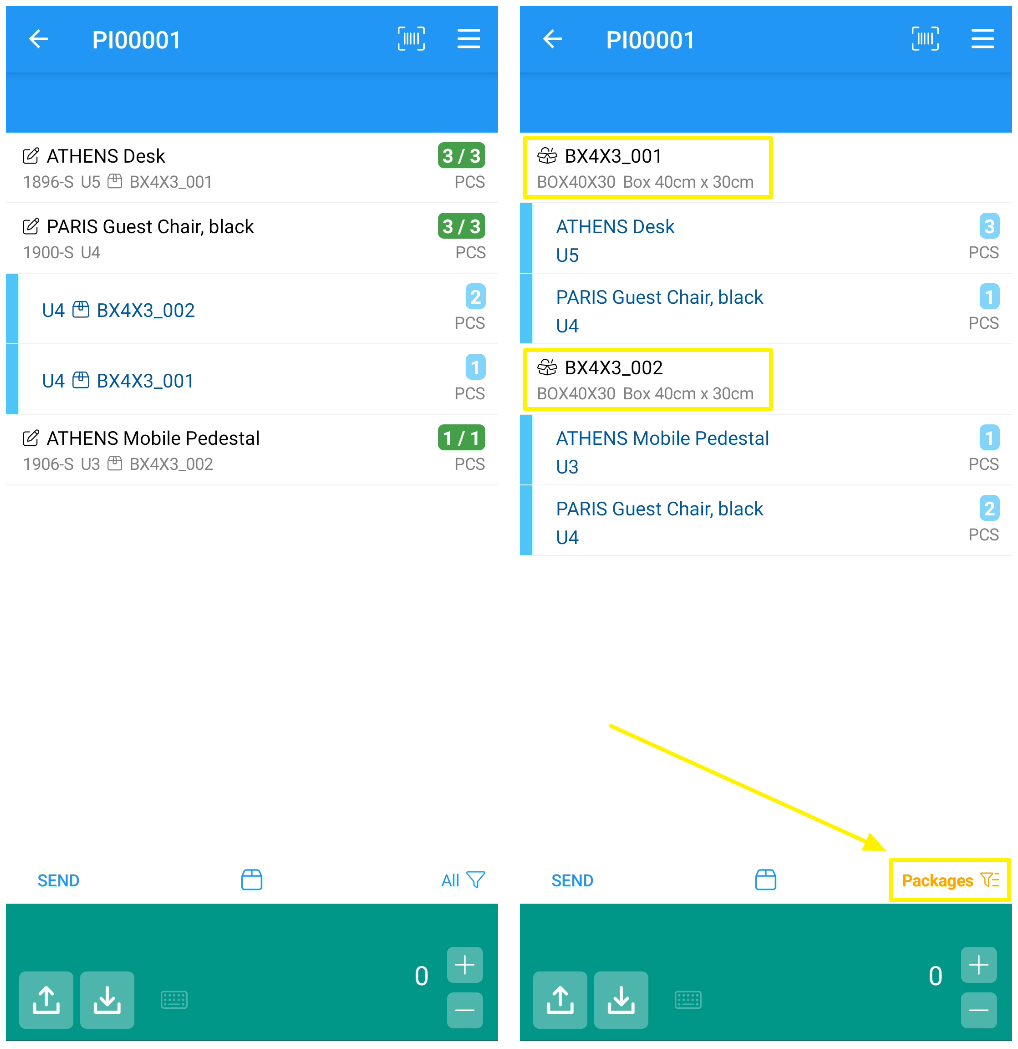
Once the package is selected, scan a bin code (if one was not already selected), scan/select an item, and specify the quantity placed in the package. Note that a document line can be splitted among several packages.
Repeat these steps until you have finished taking & placing all the items in the document.
Note that if you use the packing feature, all items in the document must be placed in packages.
At any moment you can choose the Packages filter, in order to see a list detailing all the packages and their contents:

Warehouse Shipments
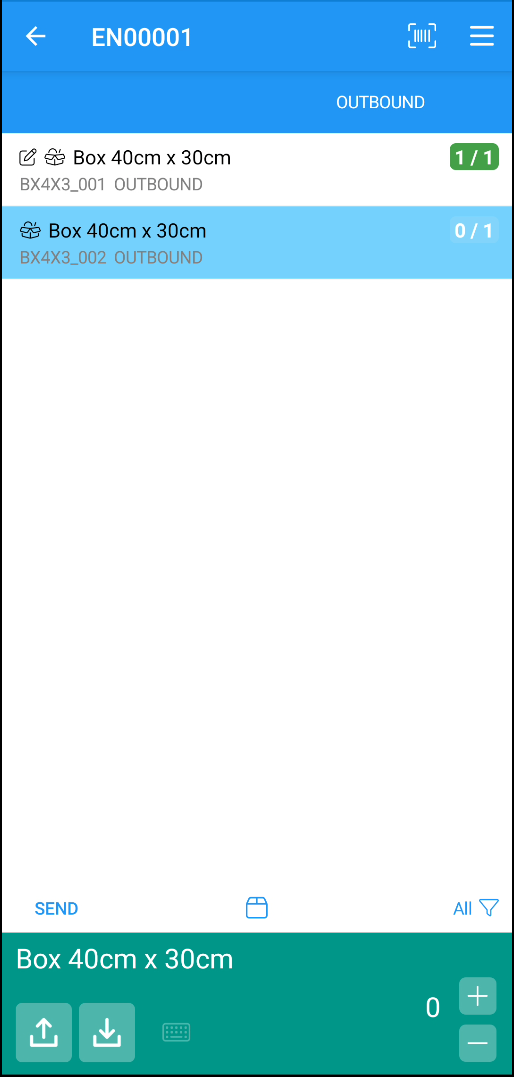
If you work with both pick and ship warehouse documents, and pack the items during the pick task, packages (instead of document lines) will be displayed when you handle the shipment document.
