Power BI - First Steps Guide
1. Install the Business Central app
Even if you already have installed iDynamics Commissions, you will need to install an extra extension that unlocks access to the Power BI features. You can install the Business Central app from the AppSource
There is nothing to configure here but, just as with the iDynamics Commissions app, once you install the app you will see a notification letting you know that you can start a 15-day trial of iDynamics Commissions Analytics. Just click on that notification to enable the trial, and you are ready to go.
The notification that lets you start the trial will be shown once you install the app, and will also be shown every time you enter BC, or navigate to the home page of Business Central.
2. Install the Power BI app
The next step is to install the Power BI app. You can install the Power BI app from the AppSource.
3. Connect the PowerBI app to Business Central
When you open the PowerBI app for the first time, you will see a notification with the message You are viewing the app with sample data. Connect your data.

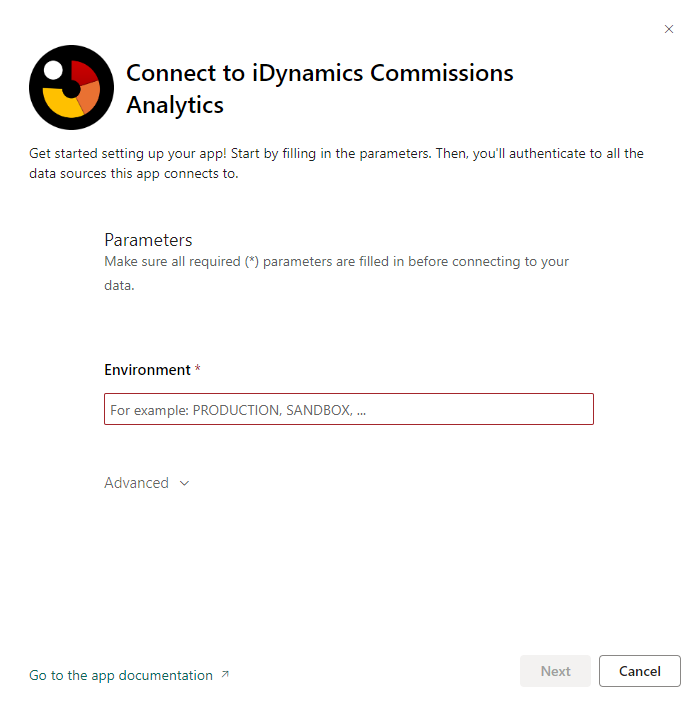
Once you click on it, a new window will open, letting you configure the connection to your Business Central environment. The most important step is the one shown below, where you have to specify the name of the environment you want to connect to.

The environment will be PRODUCTION for your production environment or the name of the sandbox to which you want to connect.
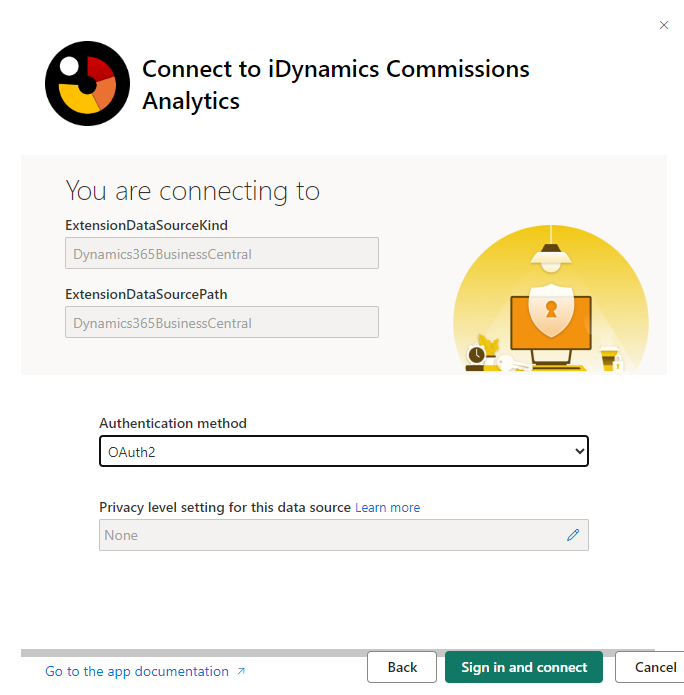
After you have completed the environment, a new window will appear. Select OAuth2 in the Authentication method, then you must log in to your Business Central account.

4. Permission Settings
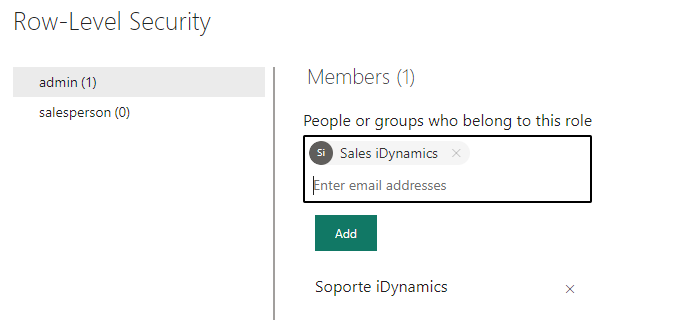
In our Power BI app, we have implemented Row-Level Security (RLS) to ensure data is accessed appropriately based on user roles. We have defined two distinct roles: Admin and Salesperson. The Admin role has comprehensive access to all data and reports within the application, allowing for full oversight and management capabilities. In contrast, the Salesperson role is restricted to viewing only the data pertinent to their specific sales and performance metrics. This segregation of data access helps maintain data confidentiality and integrity, ensuring that sensitive information is only accessible to authorized personnel.
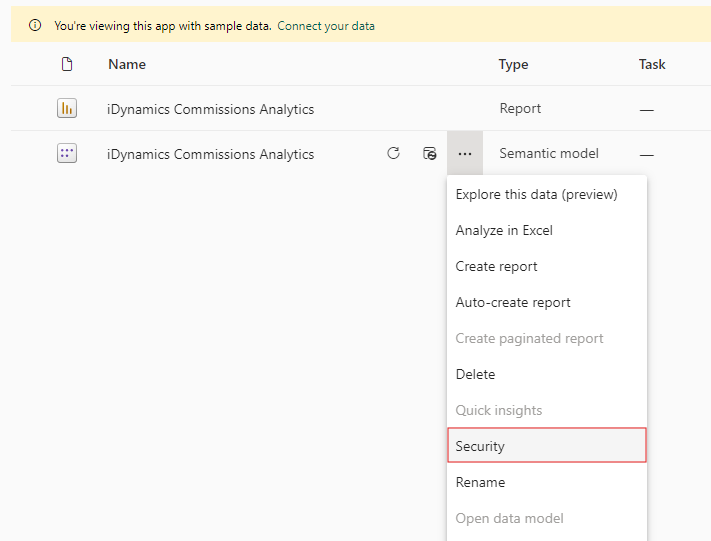
In order to set up the roles, go to the Workspace that was created when you installed the Power BI app. Then, just go to Semantic model "more options" and Security.

Once you are in, add the email of the users to the desired roles and then save.

5. Data Refresh Schedule
To set up a data update schedule, follow the steps below:
In the Workspace, select "Semantic Model" - "Settings"

Then, select "Refresh" and choose the frequency you want.

6. Share the App
First, go to the workspace that was created when the app was installed and select the option "Update app".

Then go to "Permissions" tab. Add the desired users and check the option "Install this app automatically". If this option is not enabled, you will need to enable it in Power BI's Admin Portal.

Finally, update the app and the end users will be able to enjoy the app.
Note that the users must be in one of the roles described in section 4 in order to be able to view the data.
7. Enjoy
The amount of data that you get will depend on how long you have been using Business Central and iDynamics Commissions (the Power BI app uses the sales stats generated by our app). If you have just installed iDynamics Commissions, but want to see data for previous months, you can use the update commissions/stats action, updating only sales stats if you don't want to generate commissions.