Salesperson Commissions Report
Description
This report includes all commissions for a period (this month, last month, a specific date range) or all commissions that are pending settlement. The report has been designed so that it can be customized by the customer using Microsoft Word. Both so that you can decide what information is important for you and your salespeople, and so that you can easily adapt its design to the visual identity of your company.
This report can be found in the Report menu, in the action bar of both the Salespeople/Purchasers and Commission Entries lists.

This report can be emailed in bulk to all salespeople that have achieved commissions in the selected period so that they can review it, from the dropdown available to the right of the action.
Default Layouts
By default, the app includes two example layouts (in Letter and A4 formats), each of them includes different values, so that you can check most of the available data that you can include in it, and copy/paste fields from any of them if you decide to customize them.
Default
This layout includes a summary of all commissions and the % that each commission represents on the total of each sale, as well as a breakdown of the totals for each type of document that can generate commissions.

Commission and Sales Status
This layout includes information on the payment status of the source invoice, as well as information on the settlement status of the commission.

Change the Selected Layout
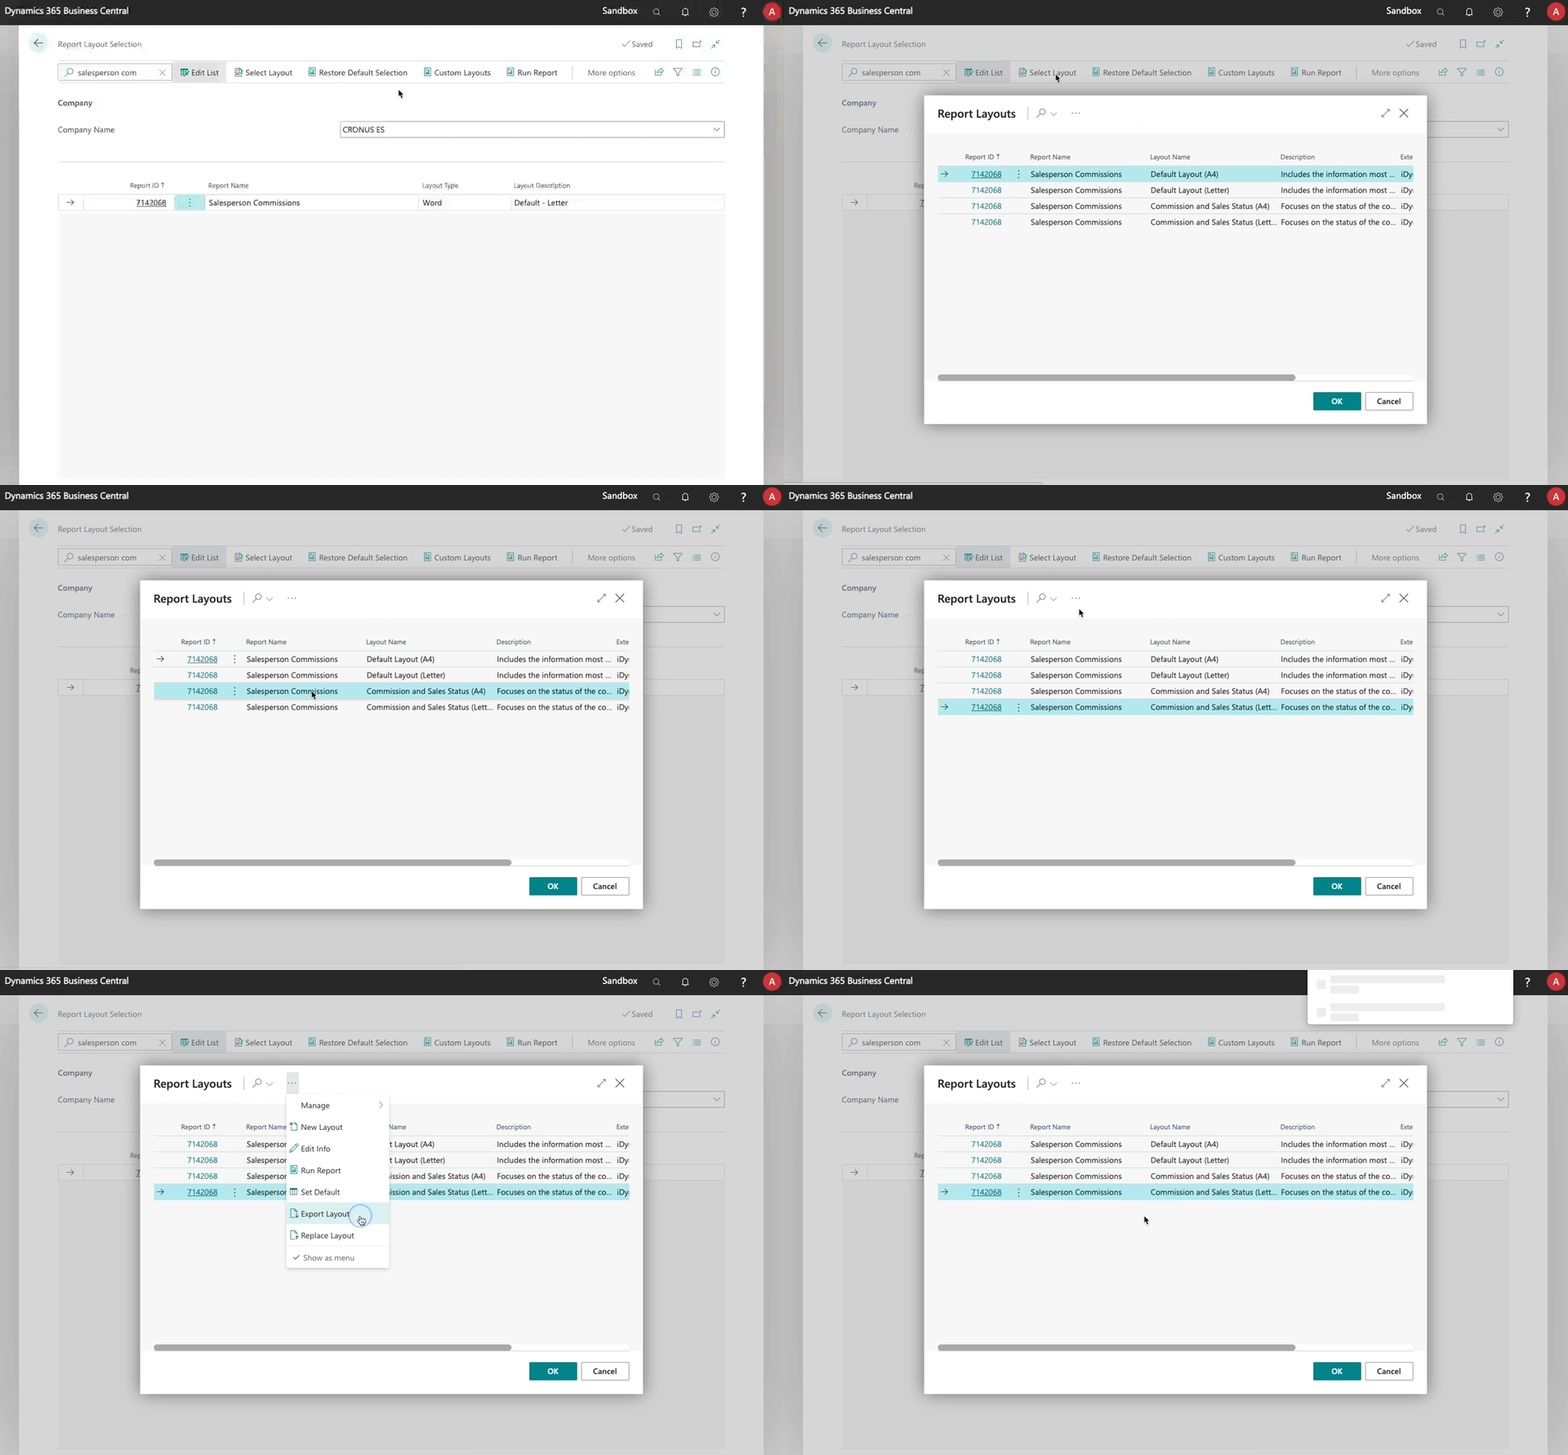
To choose between these two layouts (and between A4 or Letter page sizes), navigate to the Report Layout Selection page, in Business Central.
Here, you can search for the report name (Salesperson Commissions), select it, and use the Select Layout action.

Customize the Report
While we hope that the two included layouts will be useful as they are, we are sure that many customers will want to adjust them and use the columns (from both layouts) that are more useful to them. Not only that: as something that you will handle to your sales team, you will probably want to add your logo, adapt the colors, etc.
To do so, go to the Report Layout Selection page and click on the Select Layout action as if you were about to change the default layout.
Select the layout that you want to use as the starting point for your own and, from the "..." menu on the top of the page, select the Export Layout option. This will download the Word file for you to customize (you can download both available layouts if you want to copy/paste fields from each one).

To start, just change a few colors or fonts on the report (below we will get into adding/removing fields and columns).
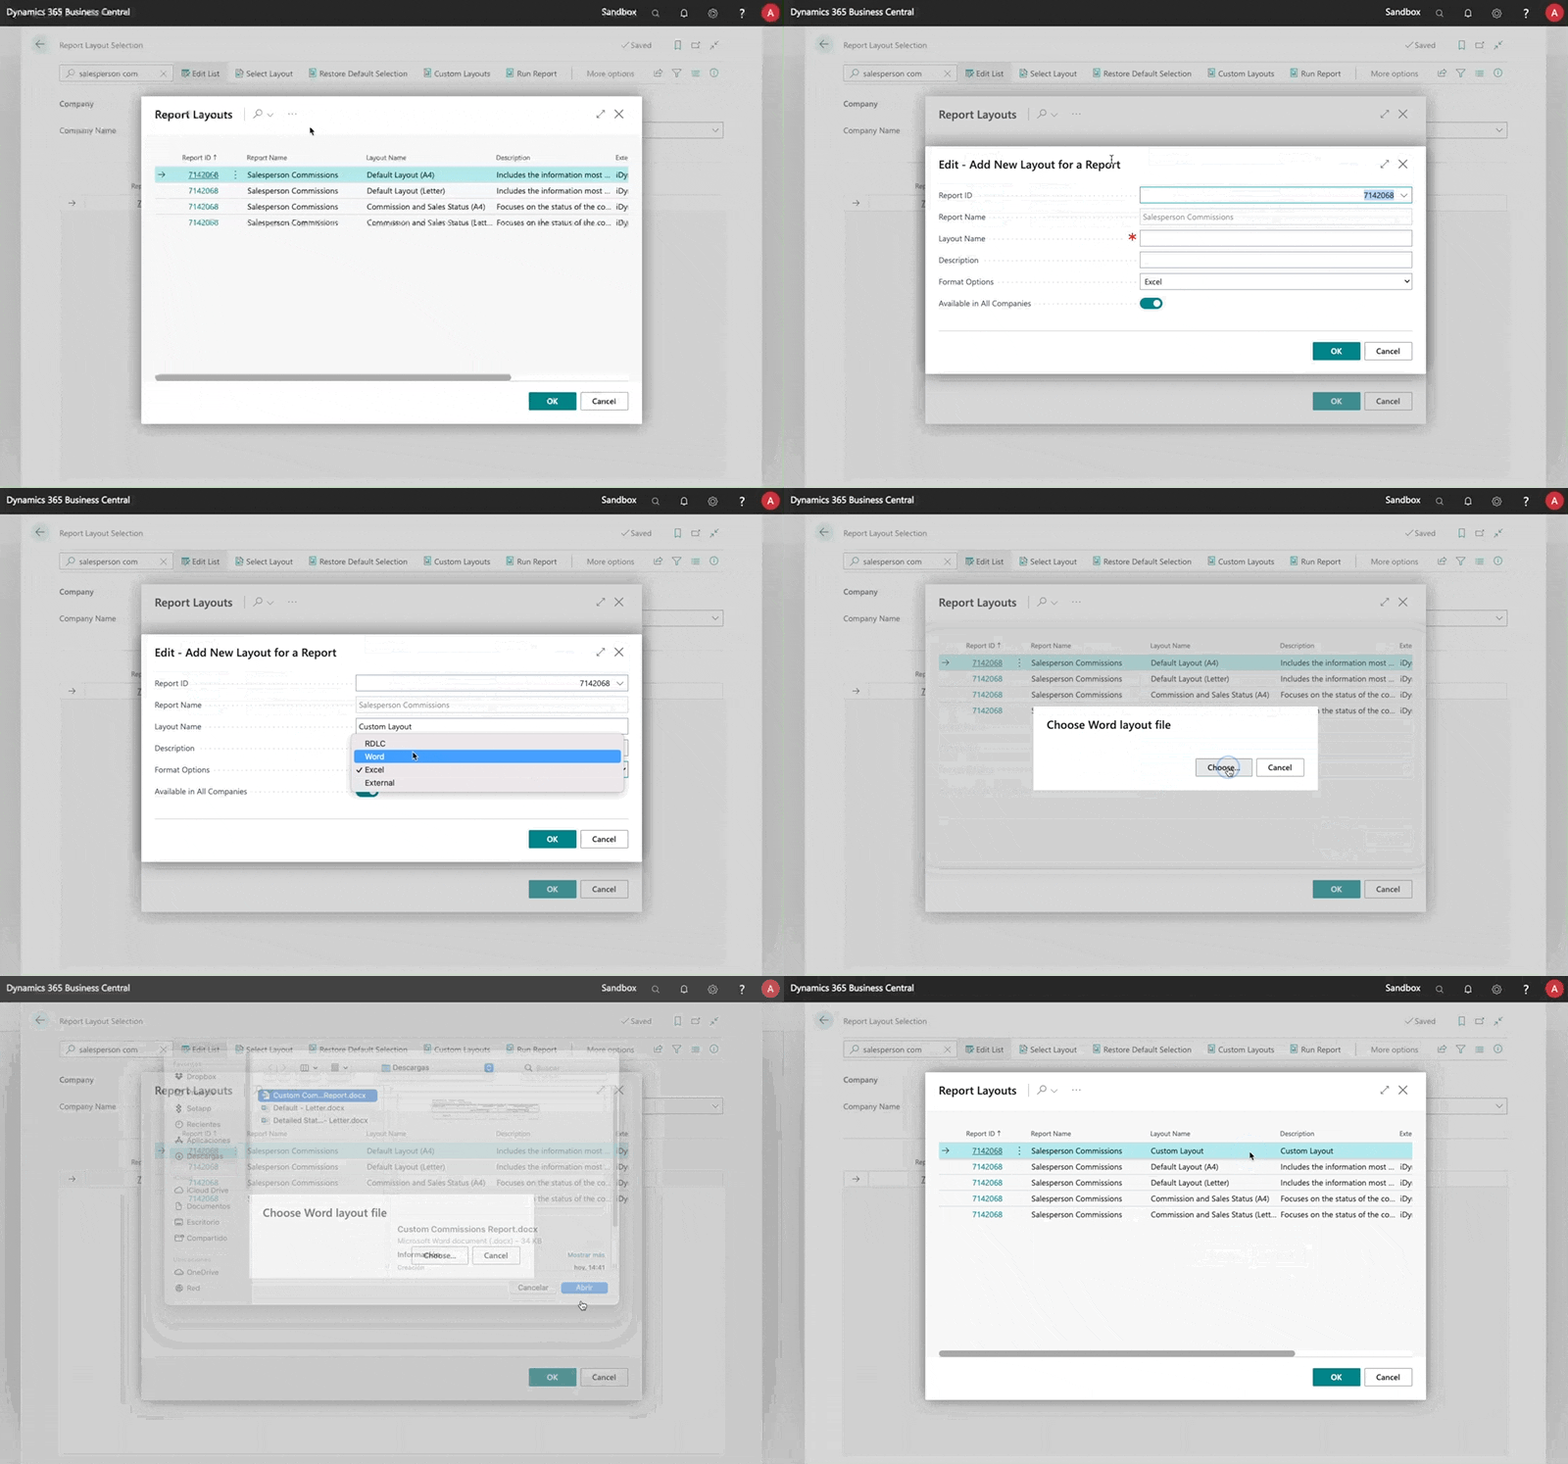
Once you have made some small changes to the report, click again in the "..." menu, and choose New Layout
In the dialog that will appear, just enter a name and a description for your new report, and be sure to specify that you are going to upload a Word file (in the Format Options field). Accept the name and description, and Business Central will ask you to upload the Word file.

Once the customized layout has been created, you can upload changes to it by using the Replace Layout option, in the "..." menu.
Remember to accept the Select Layout dialog for the new layout to take effect. Once selected, this layout will be used both when directly running the report and when sending it by email.
Add or Remove Fields from the Report
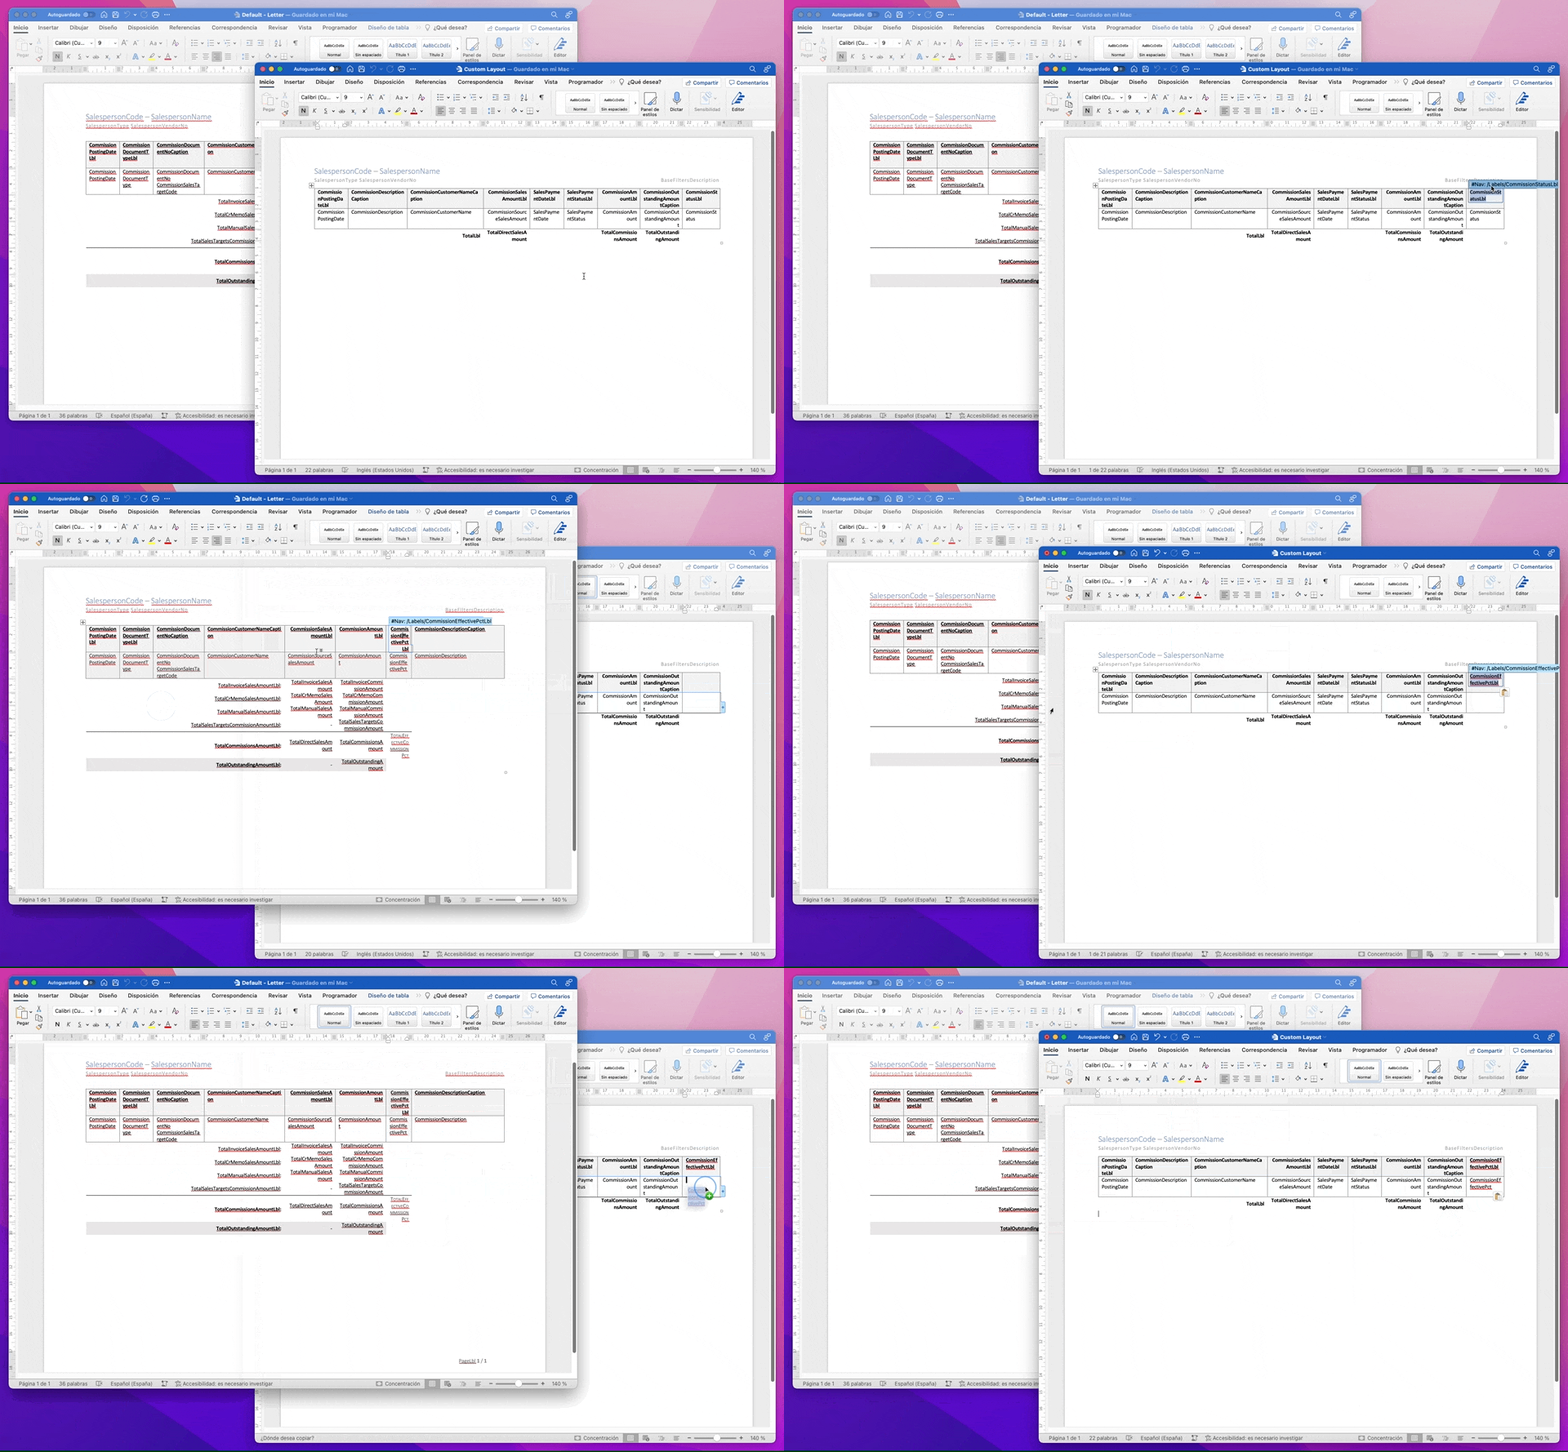
When you open the Word file, you will see that a small blue popup appears when you click on any of the fields or labels. The easiest way to rearrange the report is to delete all fields that you don't need (click on the blue popup to be sure that you do delete de field), click on a field that you want to move, and drag the blue popup to its new position in the report.
You can drag and drop from one Word to another, so you could have both base Words downloaded and add fields from both of them into the report.

Be careful not to drag one field on top of another... because Word can be quite temperamental with these things.
If you are using Word on Windows (this feature is not available on macOS), and feel adventurous, you can also enable the XML Mapping Pane, and add fields manually. See the Microsoft Docs on how to add fields to a Word report for more information. These will let you add all fields included in the report, including some extra fields not included in the default reports.
You will notice that all column titles and footers are also variables from Business Central. This is done so that they are automatically translated to the language used in Business Central. If you do not care about being able to generate the report in multiple languages, you can just delete these variables and type the titles and texts that should appear in the report.