Ad hoc Movements
Description
By ad hoc movements, we refer to those movements made by employees which have not been previously assigned to them.
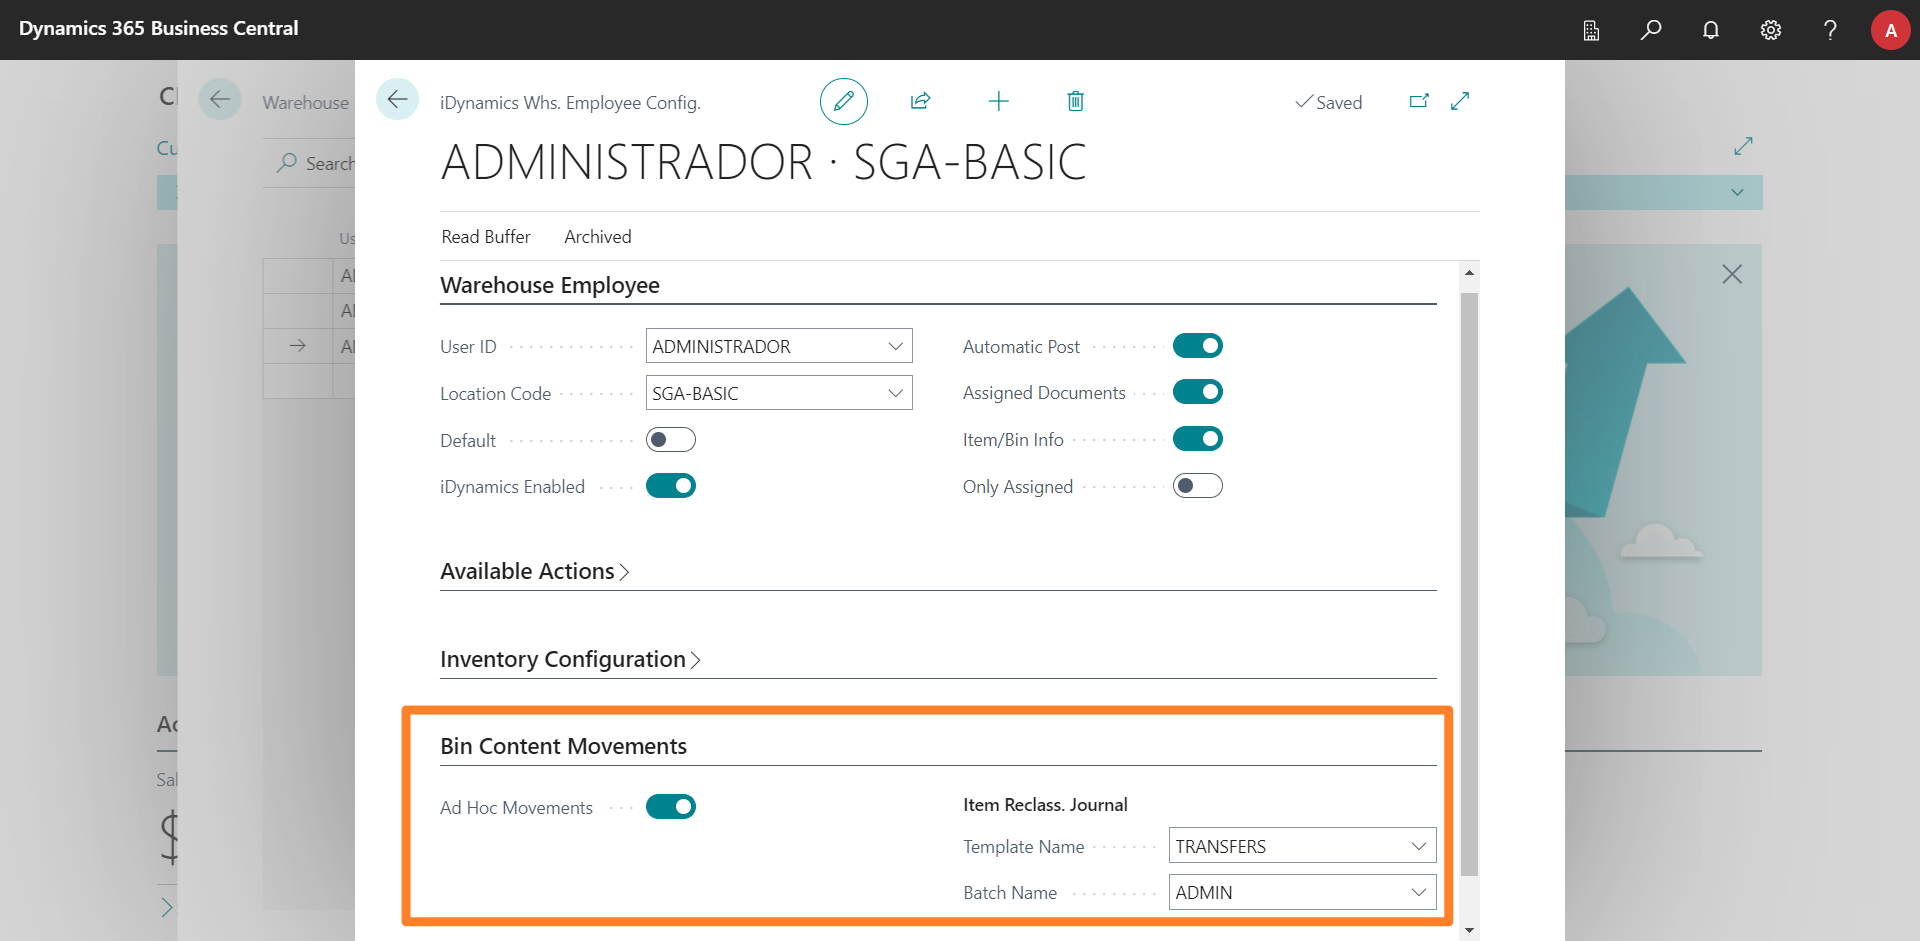
Whether or not an employee can perform this type of movement depends on whether or not the corresponding option has been activated in their warehouse employee card, and whether or not they have been assigned a template and batch section in which the item's movement will be performed within Business Central.
 .
.
Details to note:
- It is recommended to create a batch section for each of the warehouse employees, for exclusive use to perform these movements received from the mobile application. If the user has access to several locations there is no problem in assigning the same batch section to all of them, but sharing the batch section with other users or processes could cause errors, if when posting a movement another user was also accessing the template/batch section.
- Once the option is activated, the user must return to the login screen and validate themselves for the new option to appear on the mobile (the list of available options is updated when the user validates against the server).
- This option will only be available in locations that use bins.
- The application will give the option to select item or location journals depending on the selected location setup.
Using the Mobile Application
Below are the steps to perform in the mobile application, to move an item from one bin to another, once the option has been activated in your warehouse employee card.
Selecting the Bin of Origin
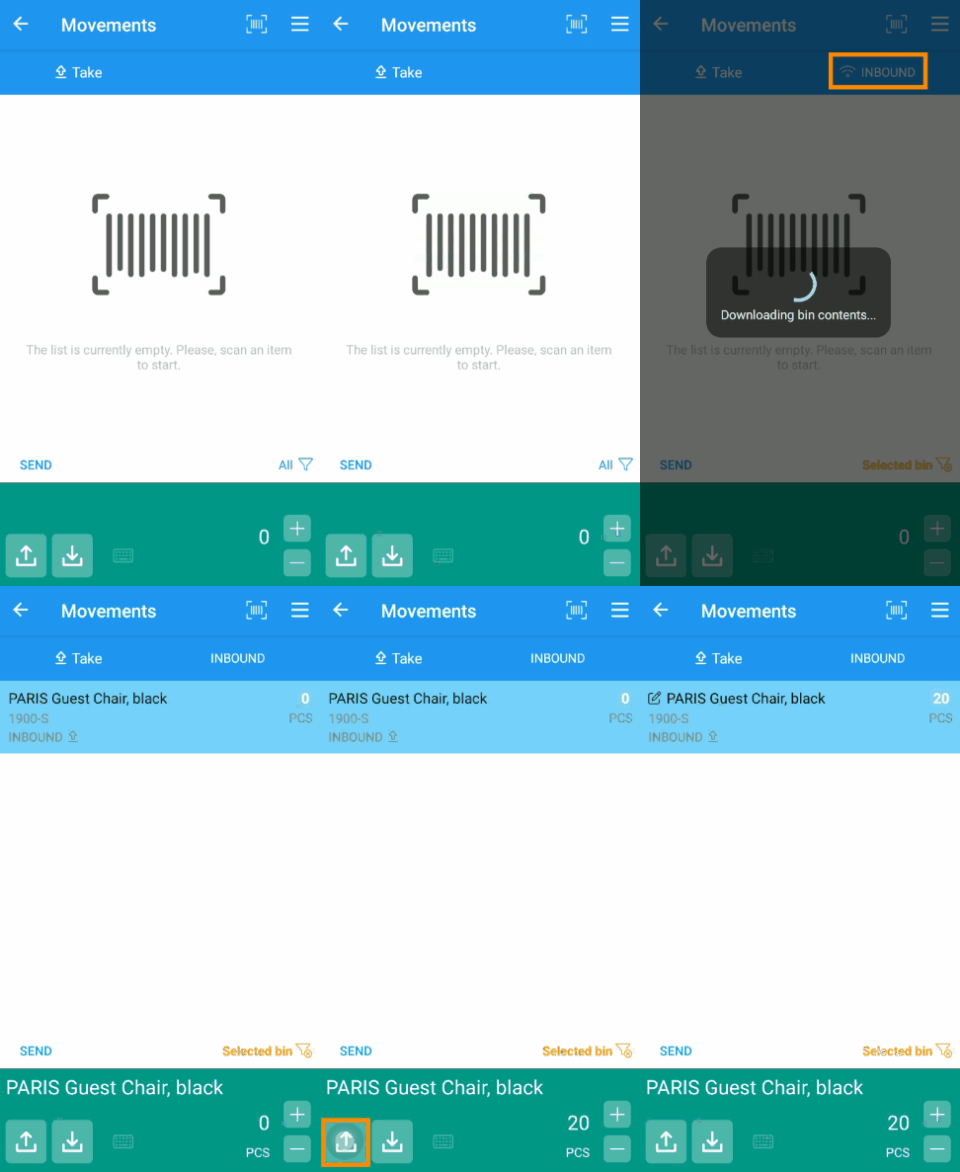
The first step, as when handling documents, is to select the bin from which we are going to take units of one or more items, either by scanning the barcode of the bin or by typing it manually using the manual scan button.
After scanning the bin, the screen will display the list of contents currently in the bin. If there is only one item in the bin, it will be automatically selected.
In addition, the selected bin will be visible at the top right of the list, where we can also click to check the available inventory of each item.
Select the item to be moved
Next, we can manually select one of the items in the bin, or scan its barcode (in this second case, the rest of the contents will be hidden). Once scanned, the item will be added to the list, and we can indicate the number of units we want to move to a different bin.

It should be noted that the application will validate that the item is in that bin according to Business Central, and will also check the maximum number of units available in that bin.
Selecting the Destination Bin
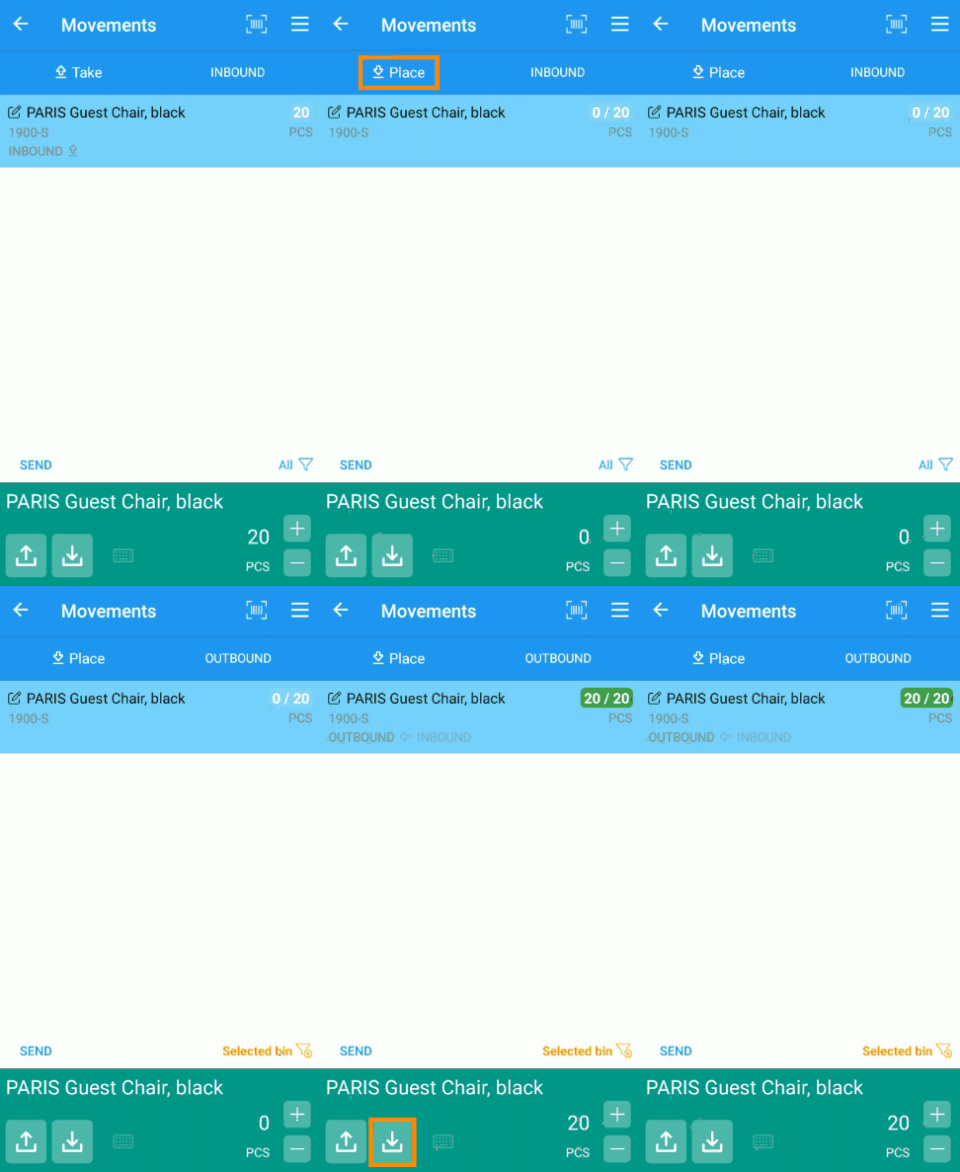
By clicking on the Take/Place action, located at the top left of the list, you can toggle between the two actions. With the Place option selected, we will scan the bin where we are going to place the item.
Select the Item to Place
At this point we can scan the barcode of the item again, or simply click on it in the list, to indicate the number of units to place in the bin.

The application will only allow placing at most the number of units taken from the origin bin, and will verify that the origin and destination bin is different for each line.
If desired, we could place only part of the quantity in the bin, and scan another bin or bins to place the rest of the units.
Moving Multiple Items at the Same Time
Although in the example we have explained how to move a single item, you can take/place as many items as you wish before posting the movement. In this sense, there is no strict order, the application will allow you to switch between both actions at any time.
Send and Post
Regardless of the user's configuration when posting documents, this screen will always give the option to Send and Post, posting the movement immediately in Business Central, so that the moved items will be available for the rest of the users in the new bin.