Barcode Scanning
Description
iDynamics Warehouse supports most Android devices with integrated barcode scanners, either natively or configured with keyboard input. In addition, on both Android and iOS, it supports the use of the camera as a scanner.
It is worth noting that iDynamics Warehouse is designed to work with barcode scanners, unlike other applications that use the scanner as an external keyboard, and require the user to select some field to "type in" the scanned code.
Scanning Test
The first step to perform, before proceeding with the rest of the document, is to verify that you can read barcodes with the App. Depending on whether you are going to use a barcode scanner, the camera, or both, choose the section that applies to you:
Check the Hardware Scanner
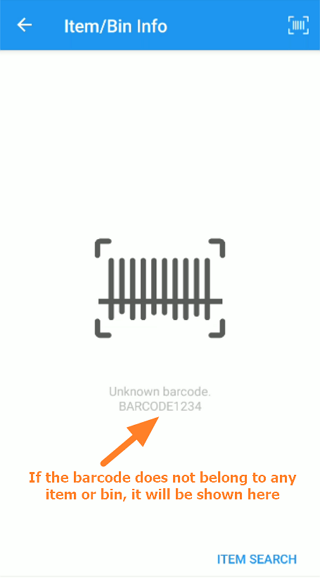
If you have an integrated or external barcode scanner, and you have already checked the Hardware Scanners setup section, the next step to take is to verify that iDynamics Warehouse is detecting it correctly. To do this, access the Item/Bin Info screen, press the scan button on the device, and read any barcode.
Even if the barcode does not correspond to any Business Central item or bin, you will know that the scanner has been correctly detected if an error message is displayed due to the incorrect scanned code (and if it is a valid code, the item or bin data will be displayed).
Check the Camera
If you are going to use the camera as a scanner, go to the Item/Bin Info screen and click on the barcode icon at the top right of the screen.
If you have not yet configured the camera as the default scanner, you will be shown the manual barcode input dialog. If you have already configured the camera as the default scanner, you can skip the step of pressing the camera button, as the scanner screen will be displayed straight away.
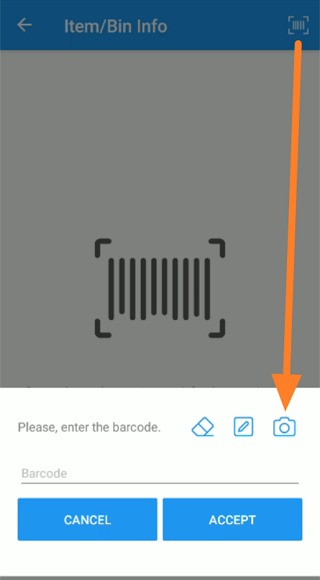
Click on the camera-shaped button to start scanning using the camera. If this is the first time you do this, you will be asked if you want to use the camera as the main scanner, so that the scanner button jumps directly to this screen without going through the manual barcode input dialog.
Point the camera at a barcode, and you will see the screen automatically close and either display the description of the item or bin scanned, or an error message with the scanned code if it does not match with any.
Scan Button
You will see a barcode icon in the upper right corner of every screen where barcodes can be scanned. By default, this button will display a dialog where you can manually enter the barcode, which is useful in case the barcode is broken or unreadable.
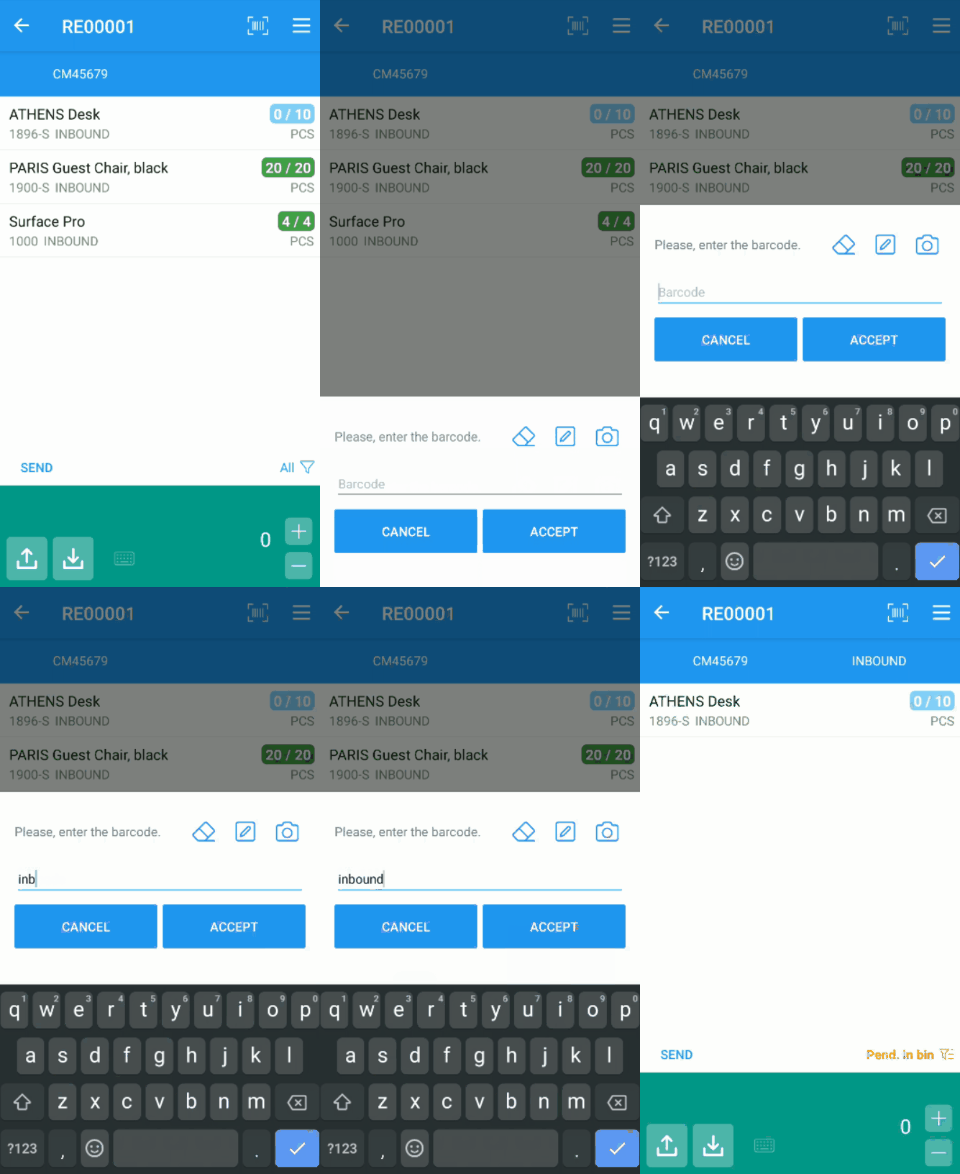
For users who will be using barcode scanners, this dialog is useful for cases where the barcode cannot be scanned and needs to be entered manually, or in case you wish to manually enter the serial number, lot number or expiration date. In all other cases, simply press the scan button on your scanner and scan the corresponding barcode.
For users who are going to use the camera, this dialog will automatically launch the scanning action with the camera (if set as default), and you can return to the manual input dialog by clicking on the pencil icon at the bottom of the screen.
Home Screen
If you scan a barcode from the home screen that corresponds to the code of a document, the application will automatically open the document.
Document Listings
In all listing screens, you can scan a barcode corresponding to one of the documents to access it directly.
Bin Scanning
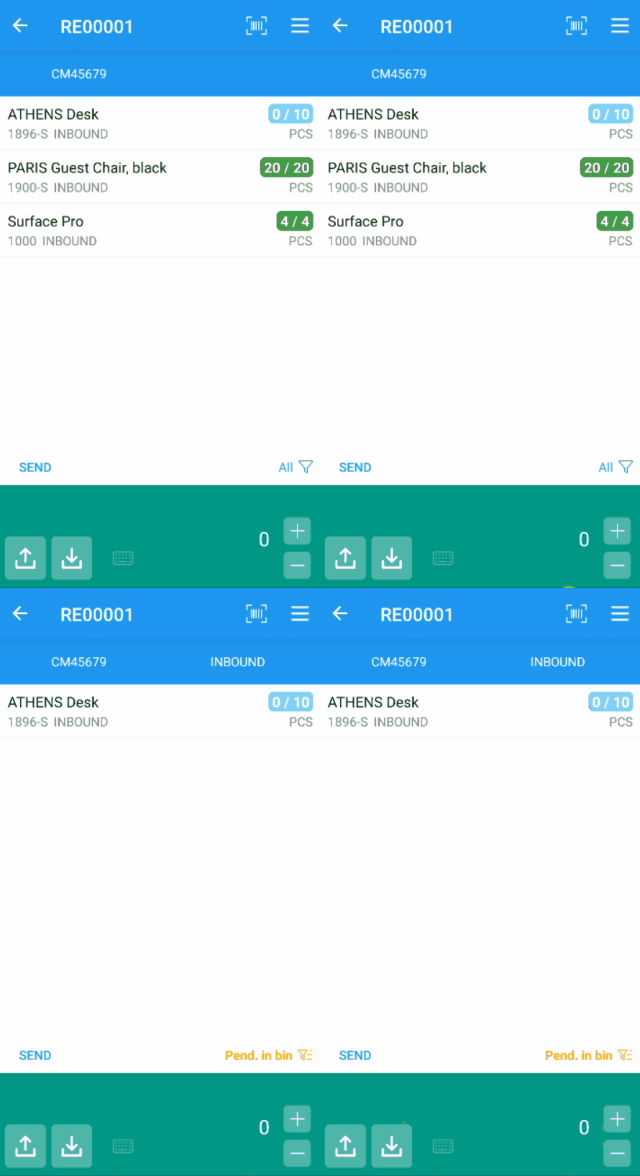
If you are working with bins, read the bin barcode from within any document, or from the ad hoc or inventory movement screen, and you will see it selected at the top right of the screen. Remember: there is no need to select any field or do anything else. Simply scan the barcode while on a screen that supports bin scanning, and it will be selected automatically.
Item Scanning
On any screen where you work with items, you can scan the item's barcode, followed by its serial and lot numbers (if applicable) so that it is automatically selected.
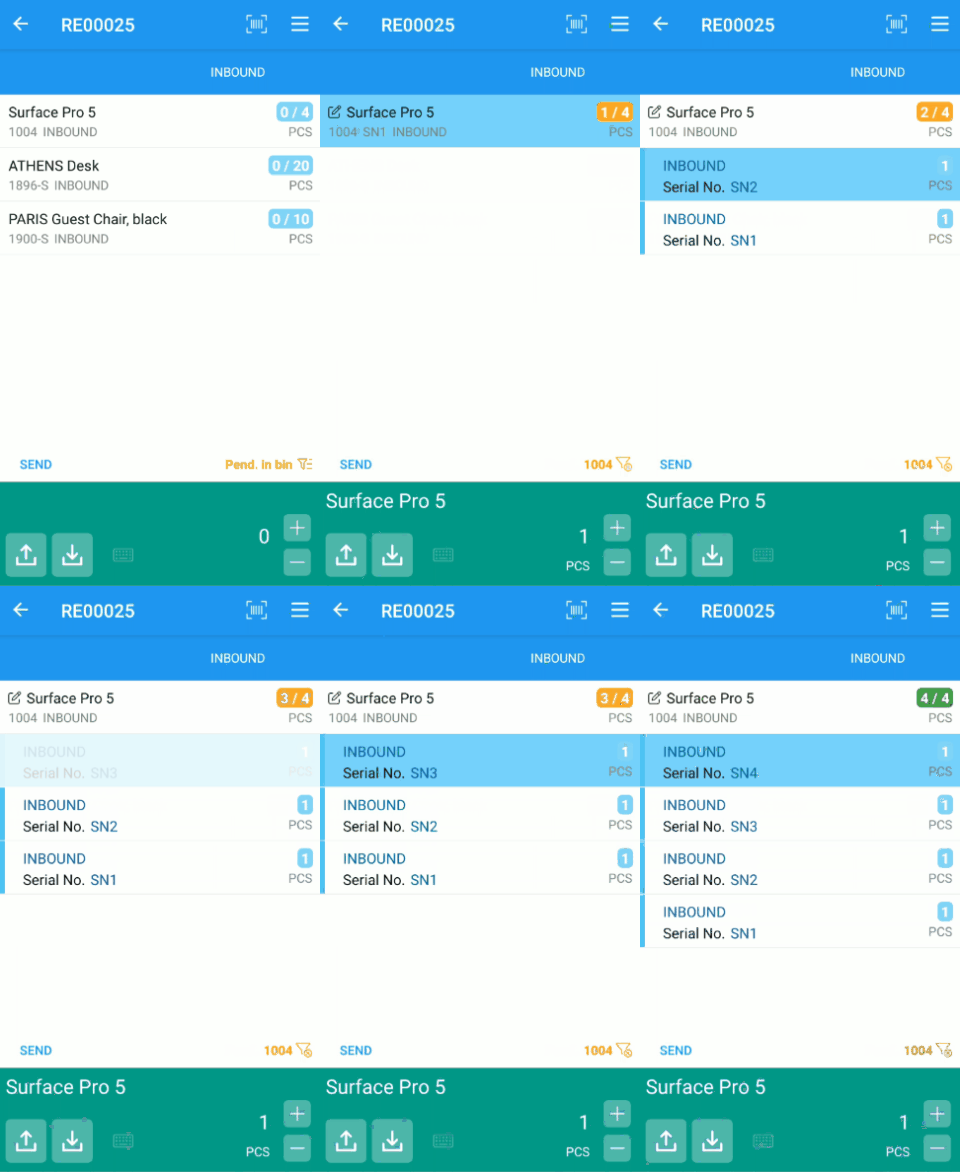
Details to keep in mind when scanning item barcodes:
- If the barcode corresponds to the Business Central item code, it will be automatically selected.
- If it does not correspond to the item code, the code will be looked up in both the reference and item identifier tables.
- The above process will always be done on the mobile phone, without connection to the server, to speed up scanning. Nevertheless, if it is a new item or reference and has not been downloaded yet, it will be checked with the server.
- If the barcode is an EAN128/GS1-128, a GS1-QR or a GS1-DataMatrix, and contains a serial number, lot, or expiration date, these will be taken into account automatically, if the item's tracking configuration requires it (otherwise they will be ignored).
- If the barcode is an EAN128/GS1-128 barcode broken into several parts, read the code containing the item code first, then read the rest of the codes. The application will automatically concatenate them.
- For items that include multiple barcodes (e.g. item identifier and serial number), read the item code first. The application will display a message informing you that the item requires a serial number (e.g. if your tracking configuration requires it). At this point, you can read all serial or lot numbers received, without the need to read the item code again.
- You can configure whether or not the application adds units automatically when scanning barcodes.
In order for the application to detect an item's tracking configuration, you will need to have upgraded to version 7.2 or higher of the iDynamics Warehouse application for Business Central.
Multiple Barcode Scanning
Sometimes, to be more productive, it is useful to simulate scanning multiple barcodes with a single scanning. This makes it possible, for example, to easily add multiple serial numbers to a product during its reception.
To activate the reading of multiple barcodes, you must specify a barcode separator. In this way, iDynamics Warehouse Lite will treat each barcode separately.
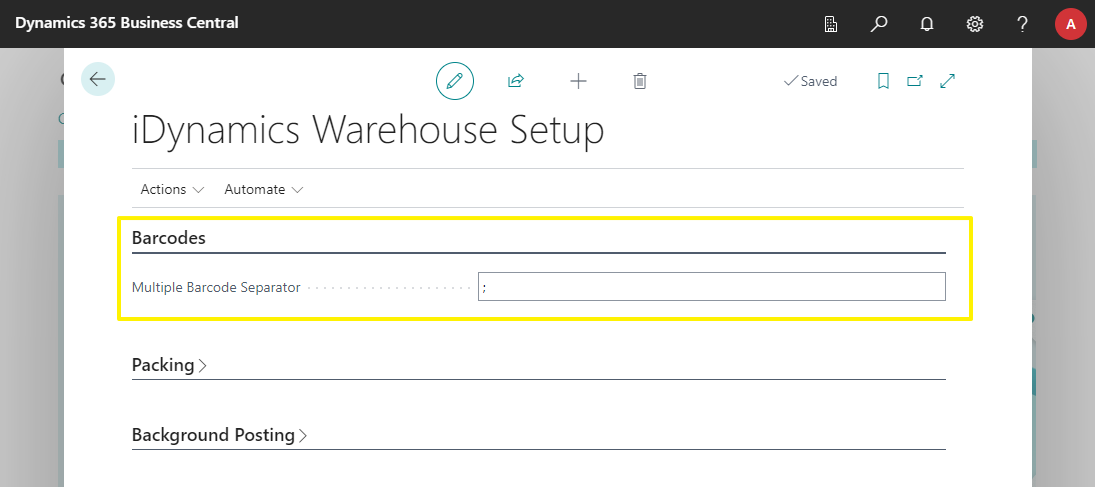
If for example we set a semicolon (";") as a separator and scan "SN1;SN2;SN3;SN4", they will be treated as if four barcodes ("SN1", "SN2", "SN3", "SN4") had been scanned.
