First Steps
Overview
iDynamics Commissions lets you set up direct commissions based on the combination of items, resources, GL accounts, salespeople and customers, so that commission entries are automatically generated once a sales document is posted. In addition, the app lets you configure sales targets for a date period and generate commissions based on the sales achieved by each salesperson (sales target commissions).
Each sales document can generate commissions for a single salesperson, or be shared between multiple salespeople.
Posting any sales document will generate all corresponding commission entries, which can be settled using settlement documents or purchase invoices (when working with external salespeople).
This brief guide should help you start using the app and introduce you to some of the new entities and concepts that it adds to Business Central. We would recommend that you follow the steps detailed in this guide without clicking on any of the links referenced by it and, once you have finished all the steps detailed in it and are a bit more familiar with the app, review it again by clicking on the different links to get a more thorough understanding of the different features offered by the app.
Welcome
Once iDynamics Commissions is installed, if you are using the Business Manager role center, you will see a new Commissions menu appear in the main Business Central menu.

This menu gives you direct access to the main features offered by the app, and we recommend you check all the different options once you have finished this guide.
Define a Direct Commission Rate
Either from the Commissions menu or by searching for Commission Rates, we can access the list of direct commission rates defined for all company sales. To start, you can define a general commission of 2%, with no filters applied.

In the previous example, a 2% commission will be generated for all sales. If you wish, you can change the filters, add extra commission rates, or click/tap on the Edit action, to see all the available options.
Create a Sales Invoice
Once a direct commission rate has been defined, we just have to create a new sales invoice, just as we did before installing iDynamics Commissions, in order to generate commissions.
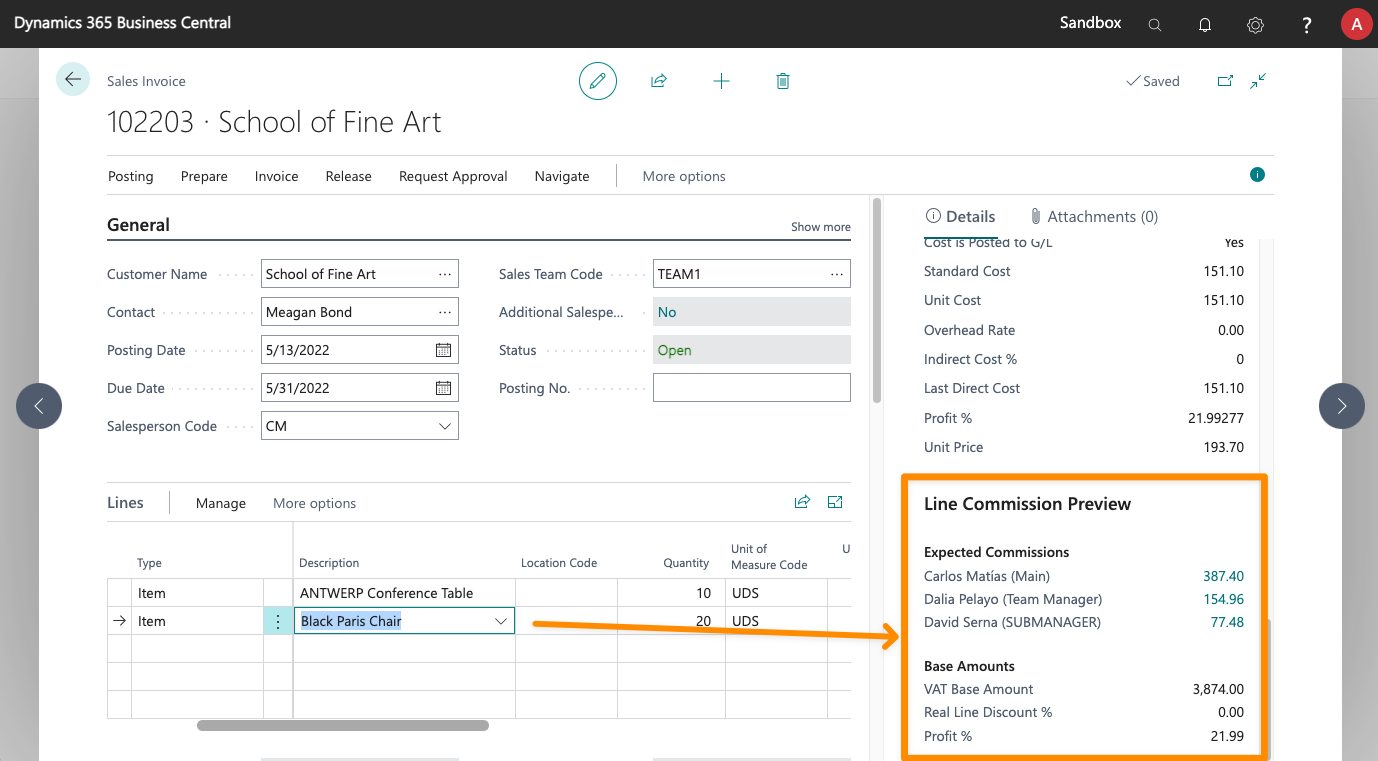
Before you post the invoice, you can run the Posting > Preview Posting action, to preview which commission entries will be generated for the document and check the commission amounts or check the Commission preview factbox, which shows the expected commissions for the sales line. We say expected, because commissions are generated when the document is posted, and commission rates could change before then.

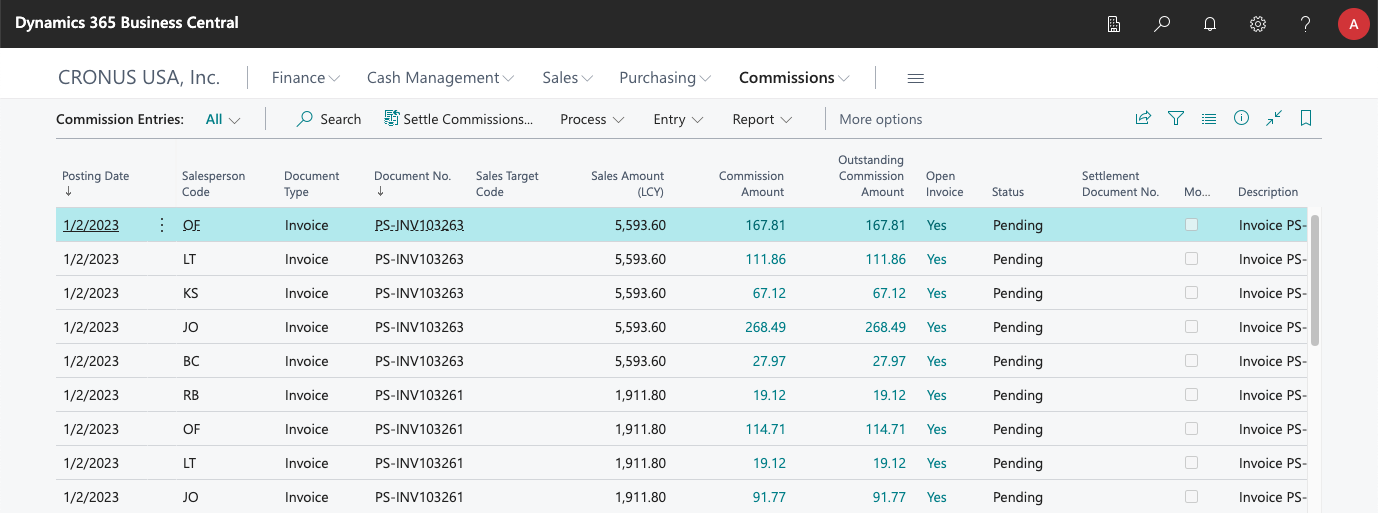
Regardless of whether you preview posting or not, once the invoice has been posted, we can navigate to the commission entries list, where we can see, and even modify, the commissions that have been generated according to the commission rate defined in the previous step.

Commissions Report
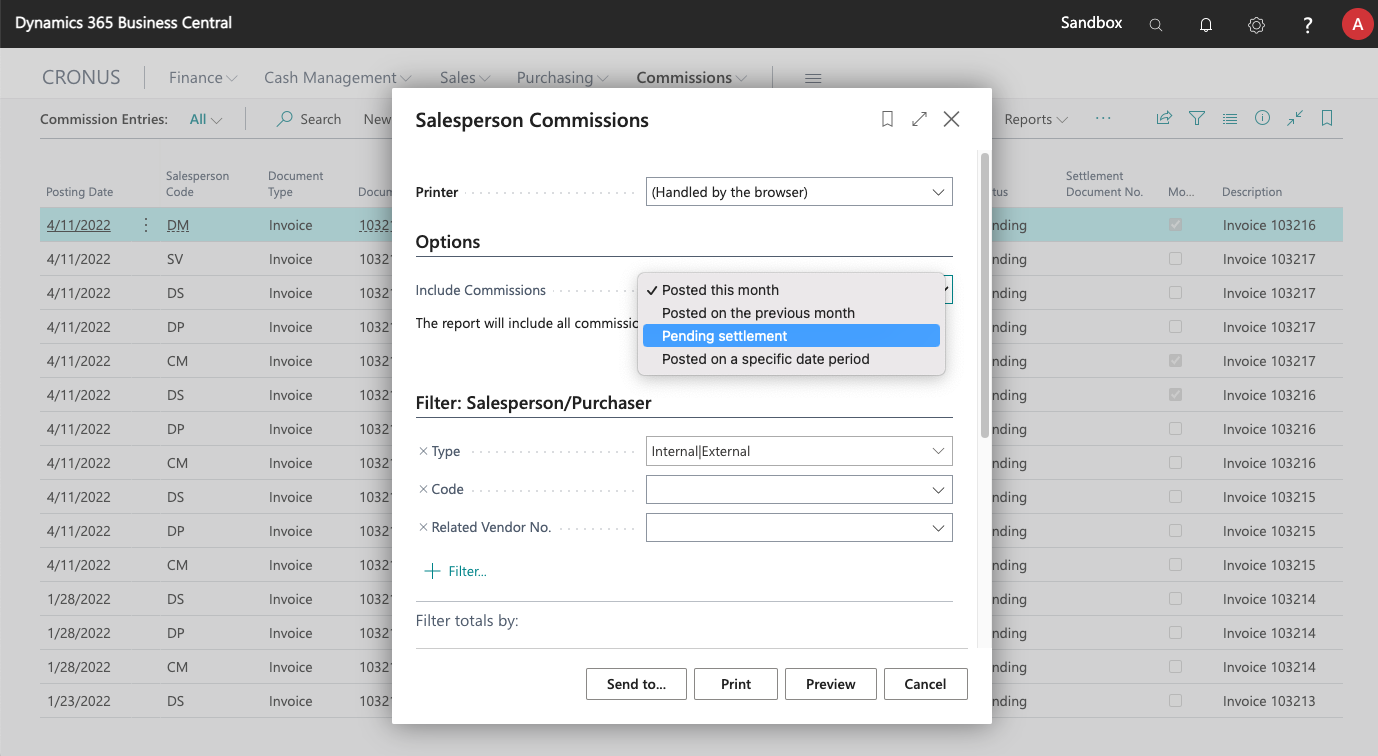
From the commission entries list, in the Report menu of the action bar, you will find the Commissions by Salesperson report, where you can get, for example, the list of commissions that have not been settled yet.

The columns shown in the report by default are just an example of the different values that can be shown in it. There are two designs of the report included in the app, and you can customize it, easily, using Word, so that you can include the columns that you need, and adapt its design to that of your company. Check this link to learn how to customize the commissions by salesperson report.

Answers to two frequently asked questions:
- If a salesperson with limited permissions runs this report, only their data will be shown in it (this applies to most reports included in the app).
- For salespeople that don't have access to Business Central, the right dropdown of the Commissions by Salesperson action gives you the option to send a copy of the report to every salesperson that has commissions in the selected period (you will see this option also available for other reports).
Commission Settlements
Once commissions have been generated, we can proceed to settle them. In order to do so, we can use settlement documents or purchase invoices. Both will settle the commissions included in them and generate posted settlement documents, the use of one or the other is going to depend on how you want to pay them (either through your internal payroll software or through BC purchase invoices). As we haven't configured anything particular for the salesperson of the sales that we posted before, a settlement document will be used by default.
Settlement documents can be created manually, adding any pending commissions one by one. However, the easiest way to create them is by using the Settle Commissions... action, available on the Commission entries list.

This process will let you choose the period for which you want to settle all outstanding commissions and, once it is run, it will generate a settlement document (or purchase invoice) for each salesperson that had outstanding commissions for that month/period. Once the process has finished, a notification will be shown with the number of documents generated, including a link with which you can navigate to them. In addition to using the previous link, you can also use the Commission Settlements link, available in the Commissions menu.
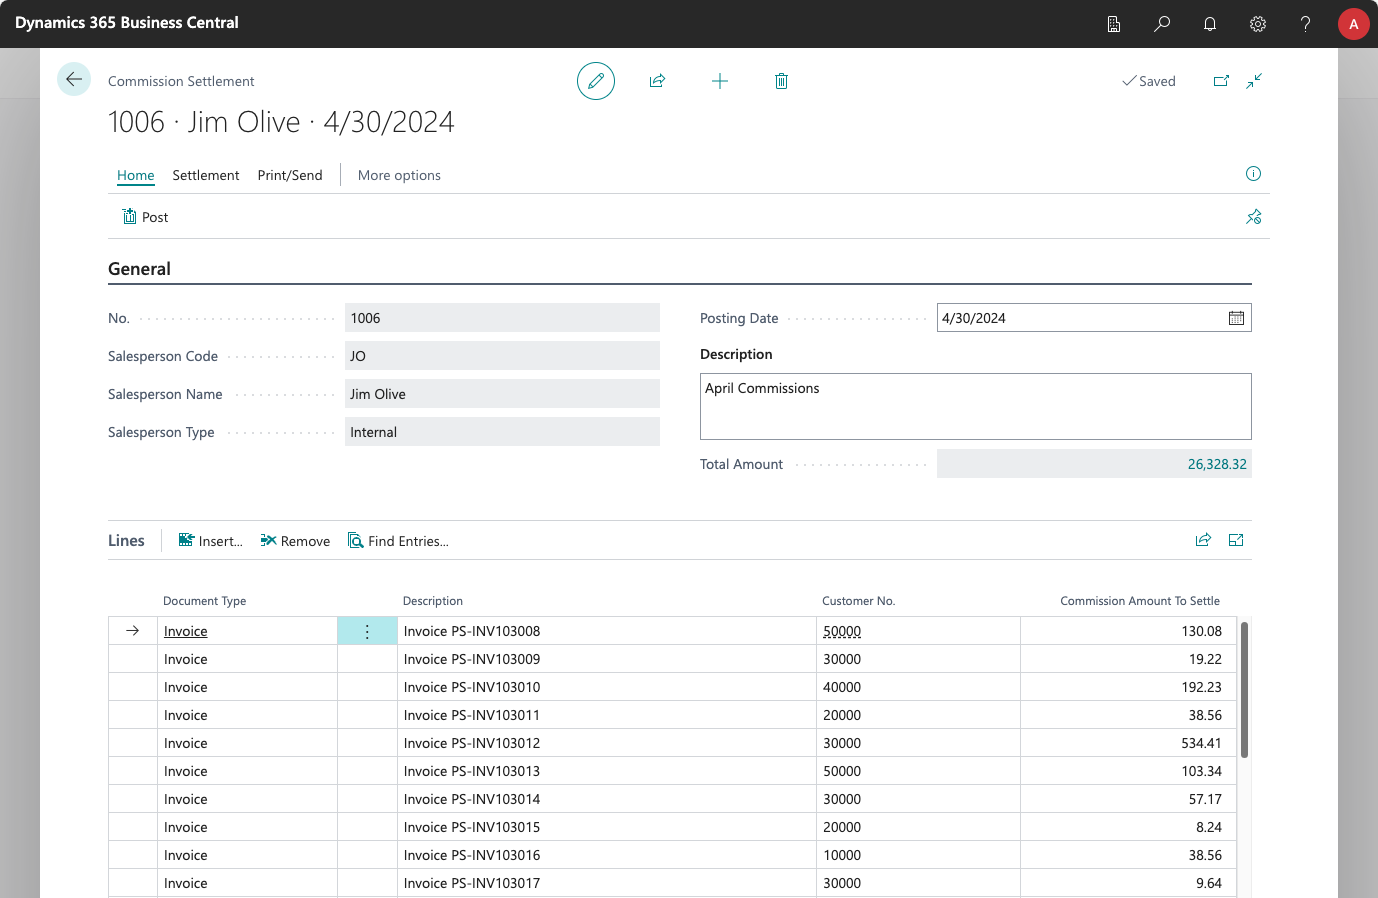
Once settlement documents have been generated, you can open any of them to view the invoices/commissions included in them and post them. Once the settlement document has been posted, the whole flow of generating and settling commissions has been completed.

Next Steps
This guide has been just a brief introduction to one of the most basic uses of the app, but we hope helped you get familiar with some of its main features. Depending on your requirements, we recommend that you:
- Check the general setup options of the app, including whether you want to settle commissions after a sales invoice is posted, or only after the invoice has been collected.
- Define sales teams and assign roles to their members.
- Configure salesperson rules, so that salespeople are assigned based on what or where something is being sold, rather than the actual customer.
- Learn about all the options available when defining direct commission rates, and create some rates that will apply to team managers, for example.
- And of course, learn how to assign multiple salespeople to a single sales document.
- Set a reference period so that you can get sales and commission statistics for it.
- Set sales targets for a period and set commissions based on the targets achieved.
- Explore the different options available that let you handle and update the generated commission entries, including the adjustment journal.
- Check how to give advances/draws on commissions.
- Set commission penalties when an invoice is not paid on time.
- Import commissions or sales stats from an external system.
- Generate or update commissions for existing invoices. One of the easiest ways to try the app is to define a few commission rates and run this process to generate commissions for the invoices already existing in your test environment.
And remember, this is just the beginning of your journey. We recommend that you start slowly by setting a few commission rates, and slowly discover the rest of the features as needed. And don't forget to check the changelog from time to time, to discover all of the features that we keep adding to the app.
Finally, if you need any help or have any questions not answered in this manual, please, do not hesitate to contact us.